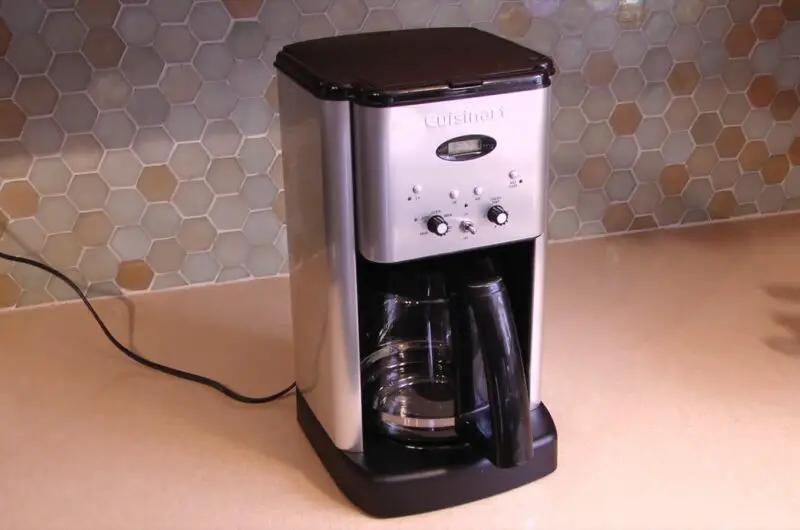
If you’re a coffee enthusiast, your Cuisinart coffee maker is likely a trusted companion, brewing that perfect cup to kickstart your day. But over time, even the best machines need a little TLC to keep performing at their peak. Mineral buildup from water (aka limescale) and coffee residue can clog the system, slow down brewing, and even affect the taste of your coffee. That’s where descaling and cleaning come in. In this guide, I’ll walk you through everything you need to know to descale and clean your Cuisinart coffee maker, ensuring it stays in top shape and your coffee stays delicious.
Whether you’ve got a classic drip model, a single-serve machine with a Keurig-style pod system, or a fancy programmable unit, the process is straightforward. I’ll cover the tools you’ll need, the descaling process, regular cleaning tips, and some troubleshooting advice if things don’t go as planned. Let’s dive in!
Why Descaling and Cleaning Matter
Before we get into the how-to, let’s talk about why this is worth your time. Every time you brew coffee, water passes through your machine’s internal components—tubes, reservoirs, and heating elements. If you’re using tap water (and most of us do), it likely contains minerals like calcium and magnesium. Over time, these minerals leave behind deposits called limescale. This chalky buildup can clog the system, making your coffee maker slower, noisier, or even causing it to stop working altogether.
Then there’s the coffee itself. Oils and tiny particles from the grounds can stick to surfaces like the carafe, filter basket, and water tank, leaving behind a stale taste if not cleaned regularly. Descaling tackles the limescale, while routine cleaning handles the coffee residue. Together, they keep your machine running smoothly and your brew tasting fresh.
Cuisinart recommends descaling every 3-6 months, depending on how hard your water is and how often you use the machine. Cleaning, on the other hand, should happen more frequently—think monthly or even after every use for certain parts. Ready to get started? Let’s gather what you’ll need.
What You’ll Need
You don’t need anything fancy to descale and clean your Cuisinart coffee maker. Most of these items are probably already in your kitchen:
For Descaling:
- White vinegar: A natural descaler that’s affordable and effective. You’ll need about 2-4 cups, depending on your machine’s size.
- Water: Plain old tap or filtered water to mix with the vinegar and rinse afterward.
- A measuring cup: To get the vinegar-to-water ratio right.
- A sink or large bowl: Somewhere to dump the used solution.
For Cleaning:
- Dish soap: Mild, unscented soap works best.
- A soft sponge or cloth: Avoid abrasive scrubbers that could scratch the machine.
- A dry towel: For wiping down surfaces.
- A small brush (optional): Like a toothbrush, for getting into tight spots like the filter basket.
Optional:
- Descaling solution: If you’d rather not use vinegar, Cuisinart and other brands sell premade descaling solutions. Follow the instructions on the bottle if you go this route.
Got everything? Great. Let’s start with descaling, since that’s the deeper maintenance step.
How to Descale Your Cuisinart Coffee Maker
Descaling removes the limescale buildup inside your machine’s water lines and heating element. The process is simple, but it does take about 30-60 minutes, depending on your model. Here’s how to do it:
Step 1: Prep the Machine
- Turn off and unplug the coffee maker: Safety first!
- Empty the water reservoir: Pour out any leftover water into the sink.
- Remove the filter and grounds: If there’s a used coffee filter or grounds in the basket, toss them out. You don’t need the filter for this process.
Step 2: Mix the Descaling Solution
- For most Cuisinart models, a 1:1 ratio of vinegar to water works well. Check your manual to confirm the reservoir capacity—common sizes are 10, 12, or 14 cups.
- Example: If your reservoir holds 12 cups, mix 6 cups of white vinegar with 6 cups of water in a measuring cup or pitcher.
- Pour the mixture into the water reservoir. If it doesn’t fill to the top, that’s fine—just don’t overfill it.
Step 3: Run the Brew Cycle
- Place the carafe: Put the empty carafe (or a heat-safe bowl if you’ve got a single-serve model) under the brew spout to catch the solution.
- Start the brew: Press the “Brew” or “On” button (some models have a “Clean” button—use that if yours does). The machine will heat the vinegar mixture and run it through the system, dissolving limescale as it goes.
- Let it sit: About halfway through the cycle, pause the machine (if possible) and let the solution sit for 15-20 minutes. This gives the vinegar extra time to break down stubborn deposits. If you can’t pause it, just let the full cycle finish and move to the next step.
Step 4: Rinse the System
- Empty the carafe: Once the cycle’s done, pour the hot vinegar-water mix down the sink. It might look cloudy or have tiny white flecks—that’s the limescale coming loose.
- Run water cycles: Fill the reservoir with plain water and run another full brew cycle. Repeat this 2-3 times to flush out any lingering vinegar taste or smell. For single-serve models, run a cycle without a pod.
Step 5: Check Your Work
- Smell the carafe or reservoir. If there’s still a faint vinegar scent, run one more water cycle. When it smells clean and neutral, you’re done descaling!
How to Clean Your Cuisinart Coffee Maker
Now that the insides are descaled, let’s tackle the parts you can see and touch. Regular cleaning prevents mold, bacteria, and stale coffee oils from building up. Here’s the breakdown:
Cleaning the Carafe
- After every use: Rinse the carafe with warm water to remove coffee residue. If it’s dishwasher-safe (check your manual), pop it in the top rack.
- Weekly deep clean: Fill the carafe with warm water and a drop of dish soap. Swirl it with a soft sponge, then rinse thoroughly. For stubborn stains, add a teaspoon of baking soda and scrub gently—it’s a natural abrasive that won’t scratch glass.
Cleaning the Filter Basket
- After every use: Dump the used filter and grounds, then rinse the basket under running water. If it’s removable, take it out for easier access.
- Monthly deep clean: Wash it with soapy water using a sponge or small brush to get into crevices. Coffee oils can hide in the mesh or corners, so give it a good scrub. Rinse and dry completely.
Cleaning the Water Reservoir
- Weekly wipe-down: Empty any water, then wipe the inside with a damp cloth and a little dish soap. Avoid soaking it too long—some reservoirs have electronics at the base.
- Air dry: Let it sit open to dry fully, preventing mold growth.
Cleaning the Exterior
- Wipe it down: Use a damp cloth with a bit of soap to clean the outside, including buttons and the warming plate (if your model has one). Dry with a towel to avoid water spots.
- Avoid harsh chemicals: Bleach or abrasive cleaners can damage the finish.
Single-Serve Models: Extra Steps
- Clean the pod holder: Remove the pod holder and rinse it after each use. Once a month, soak it in soapy water and use a brush to clean the needle that punctures the pods.
- Wipe the drip tray: Empty and wash the drip tray with soap and water weekly—or sooner if it overflows.
Tips for Success
- Check your manual: Cuisinart models vary slightly (e.g., DCC-series drip makers vs. SS-series single-serve units), so your manual might have specific advice.
- Use filtered water: It reduces limescale buildup, meaning less frequent descaling.
- Don’t skip rinsing: Vinegar’s great for descaling but terrible in coffee. Multiple water cycles ensure it’s gone.
- Set a schedule: Mark your calendar every 3-6 months for descaling and monthly for deep cleaning.
Troubleshooting Common Issues
Sometimes things don’t go perfectly. Here’s how to handle common hiccups:
- Machine won’t brew: If it’s clogged with limescale, repeat the descaling process. Check for blockages in the filter basket or pod holder too.
- Coffee tastes off: Lingering vinegar or stale oils could be the culprit. Run more water cycles or deep-clean the carafe and basket.
- “Clean” light stays on: Some models have a sensor that resets after descaling. Hold the “Clean” button for a few seconds (consult your manual for the exact reset method).
When to Replace Parts
Most Cuisinart coffee makers are built to last, but parts like the charcoal water filter (in some models) need replacing every 2-3 months. If the carafe cracks or the filter basket gets damaged, order replacements from Cuisinart’s website or a retailer like Amazon. Regular maintenance cuts down on wear and tear, so you won’t need to replace the whole machine anytime soon.
Final Thoughts
Descaling and cleaning your Cuisinart coffee maker might not be the most exciting task, but it’s a small price to pay for consistently great coffee. With just vinegar, water, and a little elbow grease, you can keep your machine humming along for years. Plus, there’s something satisfying about sipping a fresh brew from a spotless coffee maker—it’s like giving your morning routine a mini upgrade.
So, next time your coffee starts tasting funky or the brew cycle slows down, don’t panic. Grab that vinegar, roll up your sleeves, and give your Cuisinart the care it deserves. Your taste buds (and your machine) will thank you.
Happy brewing!


