Watermelon wine, with its vibrant color and refreshing taste, is a delightful summer beverage that can be made right in your own kitchen. This fruity and aromatic wine is perfect for sipping on a hot day, and it’s a fantastic way to preserve the essence of summer well into the cooler months. In this comprehensive guide, we will take you through the step-by-step process of making watermelon wine, from selecting the best watermelons to bottling and aging your homemade creation.
Selecting the Right Watermelons
The key to crafting a delicious watermelon wine starts with selecting the freshest and ripest watermelons. Here’s what you need to look for when choosing your main ingredient:
Ripe Watermelons: Look for watermelons that are heavy for their size and have a uniform shape. A ripe watermelon should have a dull, matte finish rather than a shiny one. The spot where it rested on the ground should have a creamy, yellowish color.
Sweetness and Aroma: Give your watermelons a gentle tap. They should produce a deep, resonant sound. Also, check for a sweet and fruity aroma emanating from the stem end of the fruit.
Seedless or Seeded: Depending on your preference, choose between seedless or seeded watermelons. Seedless watermelons are more convenient for wine-making, as you won’t need to remove seeds later.
Gathering Your Equipment
Before you begin the watermelon wine-making process, it’s essential to gather all the necessary equipment. Here’s a list of items you’ll need:
Ingredients:
Ripe watermelons (approximately 20-25 pounds for a 5-gallon batch)
Sugar
Water
Wine yeast
Campden tablets (optional, for sanitization)
Pectic enzyme (optional, for clarity)
2.2. Equipment:
Large food-grade plastic fermenting vessel with lid (6-7 gallons)
A secondary fermentation vessel (glass carboy or another plastic vessel)
Airlock and stopper
Nylon straining bag or cheesecloth
Hydrometer
Long stirring spoon
Siphoning equipment
Bottles and corks or screw caps
Corker or capper
Wine bottles and labels (for storing and identifying your wine)
2.3. Sanitization:
Iodophor or another food-grade sanitizer
Preparing the Watermelon Must
Wash and Chop: Begin by thoroughly washing the watermelons to remove any dirt or contaminants from the surface. Cut the watermelons into small pieces, removing the rind and any seeds if you’re using seeded watermelons.
Mashing and Extracting Juice: Place the watermelon pieces in your food-grade plastic fermenting vessel and use a clean potato masher or your hands to mash the fruit. This will help release the juice. Don’t worry if there are still some small chunks; they will be strained out later.
Adding Sugar: The amount of sugar you need will depend on the watermelon’s natural sweetness and your desired sweetness level for the wine. A common starting point is 2 pounds of sugar per gallon of watermelon juice. Dissolve the sugar in hot water to create a sugar syrup, then add it to the mashed watermelons.
Fermentation
Adding Campden Tablets (optional): Crush and dissolve Campden tablets in water as per the package instructions. Campden tablets help sanitize the must by eliminating unwanted wild yeast and bacteria. This step is optional but recommended for ensuring a clean fermentation.
Pitching Yeast: Sprinkle wine yeast over the surface of the must, and then gently stir it in. Cover the fermenting vessel with the lid and attach the airlock.
Primary Fermentation: Allow the must to ferment at a consistent temperature of around 70-75°F (21-24°C). Check the airlock regularly; it should bubble as the yeast converts sugar into alcohol. Primary fermentation typically lasts about 7-14 days.
Racking and Secondary Fermentation
Racking: After the initial fermentation has slowed down and the bubbling in the airlock has significantly slowed or stopped, it’s time to rack the wine. Carefully siphon the liquid from the primary fermenter into a clean secondary fermentation vessel, leaving behind any sediment.
Optional: Add Pectic Enzyme (for clarity). Pectic enzyme can help clarify your wine by breaking down pectin compounds in the watermelon. Follow the package instructions for adding the enzyme.
Secondary Fermentation: Attach an airlock to the secondary vessel and allow the wine to continue fermenting and clearing for a few weeks to a few months. During this time, the watermelon wine will develop its flavors and aroma.
Bottling and Aging
Clearing and Testing: Monitor your wine’s clarity during the secondary fermentation. Once it has cleared, use a hydrometer to confirm that fermentation has completed. The specific gravity should be stable for several days in a row, indicating that all the sugar has been converted into alcohol.
Siphoning: Carefully siphon the clear wine from the secondary fermenter into clean wine bottles, leaving some space at the top for expansion.
Corking or Capping: Seal the bottles with corks or screw caps, depending on your preference. A corker or capper will be needed to securely close the bottles.
Aging: Store your watermelon wine in a cool, dark place for at least several months to allow the flavors to mature and meld. Many watermelon wines benefit from aging for a year or more.
Enjoying Your Homemade Watermelon Wine
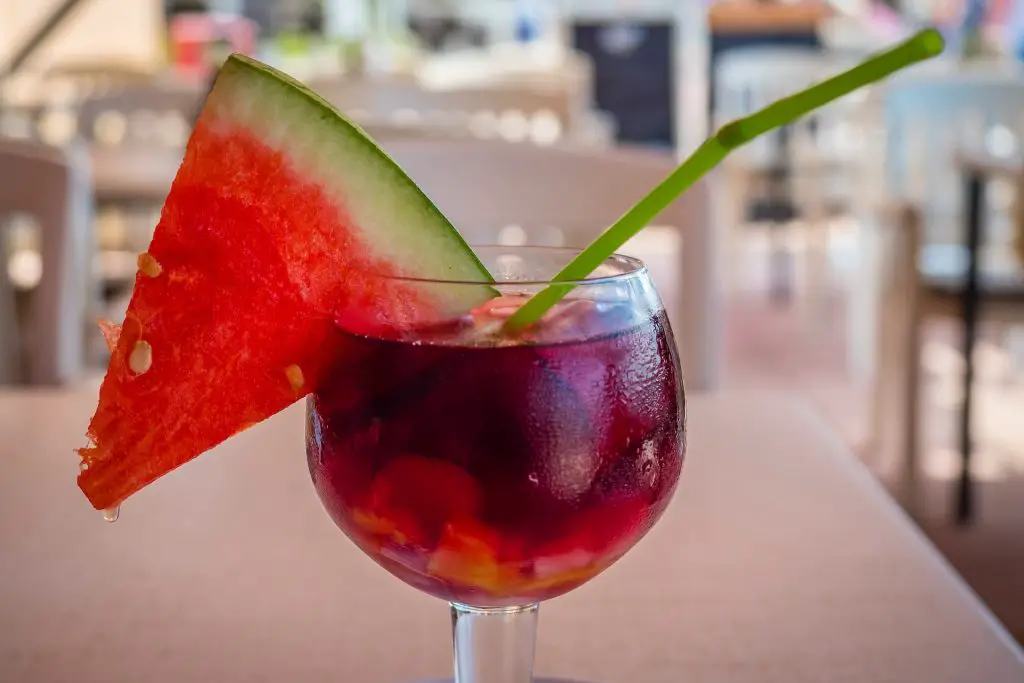
Chilling and Serving: Before serving, chill your watermelon wine to the appropriate temperature. Serve it in wine glasses or chilled wine flutes to fully enjoy its flavor and aroma.
Pairing: Watermelon wine pairs well with a variety of dishes, making it a versatile choice for different occasions. It complements light salads, seafood, grilled chicken, and even spicy cuisines.
Crafting your own watermelon wine is a rewarding endeavor that allows you to capture the essence of summer in a bottle. With the right watermelons, equipment, and a little patience, you can produce a delightful homemade wine that will impress your friends and family. So, embrace the art of winemaking and start your journey to creating a delicious and refreshing watermelon wine that will make your taste buds dance with every sip. Cheers to liquid sunshine!
Tips and Troubleshooting
Experimentation: While this guide provides a basic watermelon wine recipe, don’t be afraid to experiment with different variations. You can adjust the sweetness, acidity, or even add other fruits for a unique twist on your watermelon wine.
Adjusting Sugar: If your watermelon wine turns out too sweet or not sweet enough, you can make adjustments. To sweeten, dissolve more sugar in a small amount of water, add it to your wine, and let it ferment until it reaches your desired sweetness level. To reduce sweetness, you can try blending it with a drier wine or adding a dry white wine to the mix.
Aging: While aging is essential for improving flavor, be patient and avoid opening bottles too soon. Most homemade wines benefit from aging for at least six months, if not longer.
Sanitation: Keep all your equipment and utensils clean and sanitized throughout the winemaking process. Contamination can lead to off-flavors and spoil your wine.
Stabilizing: If you want to prevent fermentation from restarting in the bottle (which can lead to excess carbonation or bursting corks), you can stabilize the wine with potassium sorbate and potassium metabisulfite before bottling.
Carbonation: If you prefer a sparkling watermelon wine, you can add a small amount of priming sugar and yeast to the wine just before bottling. Be sure to use appropriate champagne bottles and caps to handle the pressure.
Troubleshooting:
If your wine tastes off or unpleasant, it may need more aging to mellow the flavors.
Cloudiness can be addressed by using fining agents or allowing the wine to settle further before bottling.
If fermentation is too slow or has stopped prematurely, you may need to re-pitch yeast or address temperature fluctuations.
Sharing Your Watermelon Wine
Labeling: Create unique labels for your watermelon wine bottles. Personalized labels not only add a professional touch but also help you identify and date your creations.
Gifting: Homemade watermelon wine makes an excellent gift for friends and family. Share the joy of your winemaking with loved ones on special occasions.
Wine Tasting Parties: Host a wine tasting event featuring your watermelon wine alongside other homemade or store-bought wines. This is a fun way to share your creation and gather feedback.
Documentation: Keep detailed records of your watermelon wine-making process, including ingredients, measurements, and observations. This will help you replicate successful batches and improve upon them in the future.
Making watermelon wine is a delightful and rewarding hobby that allows you to savor the flavors of summer year-round. From selecting the perfect watermelons to aging and sharing your creations, this comprehensive guide has provided you with all the knowledge and steps needed to create your very own liquid sunshine. With practice and patience, you can refine your winemaking skills and produce watermelon wine that will impress both yourself and those fortunate enough to taste it.