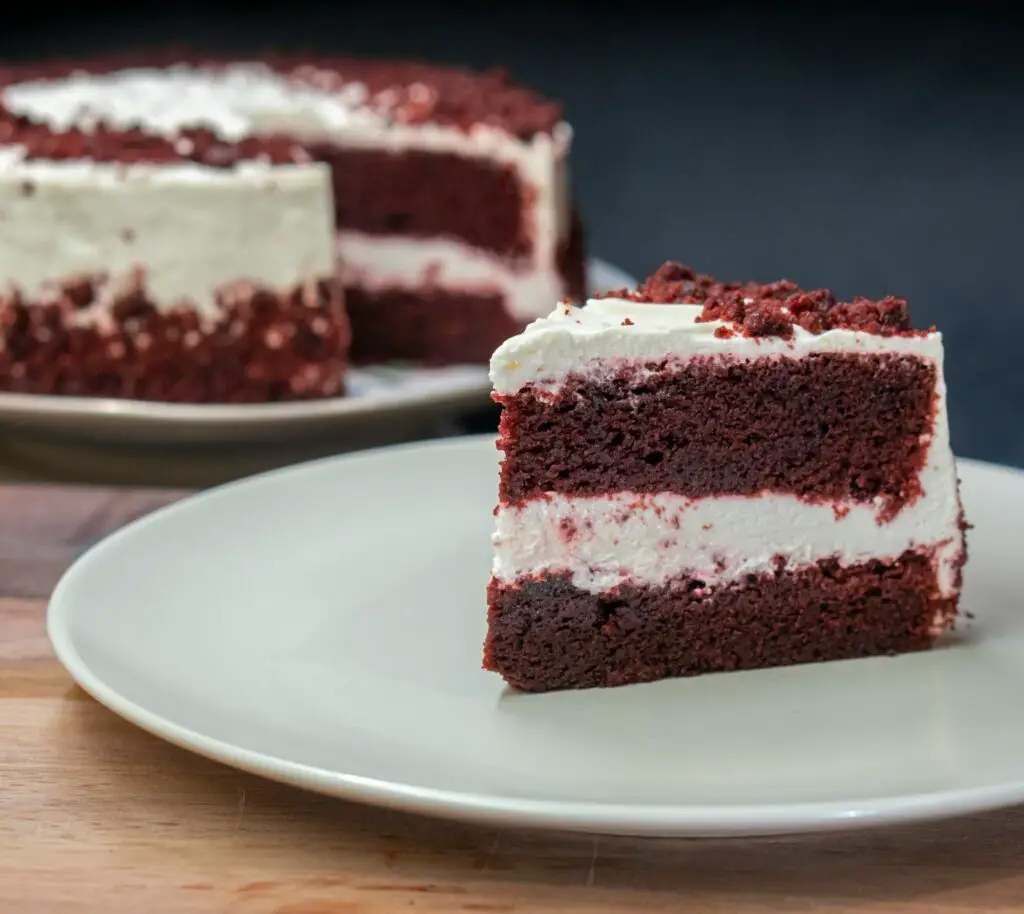
Red velvet cake, with its distinctive bright red color and velvety smooth texture, is a beloved dessert that has graced tables for generations. This classic cake, often layered with ermine icing or cream cheese frosting, offers a unique combination of sweet, tangy, and slightly chocolatey flavors, making it a favorite for celebrations and everyday indulgences alike. In this article, we delve into the rich history of red velvet cake, explore its key ingredients, and provide a tried-and-true recipe for you to make your own delicious version at home.
A Brief History of Red Velvet Cake
The origins of red velvet cake are somewhat murky, with various stories and legends adding to its mystique. Some accounts trace the cake’s roots back to the Victorian era, where “velvet” cakes were served as a symbol of luxury and sophistication. However, the distinctive red color that we associate with red velvet cake today is a relatively modern development, believed to have gained popularity during the early 20th century.
One popular theory suggests that the red hue was originally the result of a reaction between natural cocoa powder, which contains anthocyanins, and acidic ingredients like buttermilk and vinegar. This reaction would give the cake a reddish-brown color. Over time, as cocoa processing methods changed, bakers began adding food coloring to achieve the cake’s signature bright red appearance.
Key Ingredients for the Perfect Red Velvet Cake
Flour: All-purpose flour works best for creating a light and fluffy texture.
Cocoa Powder: A small amount of unsweetened cocoa powder adds a subtle chocolate flavor.
Buttermilk: The acidity of buttermilk contributes to the cake’s tender crumb and reacts with baking soda to help the cake rise.
Vinegar: White vinegar enhances the cake’s acidity, improving its texture and helping to set its vivid color.
Butter and Oil: A combination of butter for flavor and vegetable oil for moisture ensures the cake is both tasty and soft.
Sugar: Granulated sugar adds sweetness and helps with the cake’s structure.
Eggs: Eggs bind the ingredients together and contribute to the cake’s richness.
Vanilla Extract: A splash of vanilla adds depth to the cake’s overall flavor profile.
Red Food Coloring: For that classic red velvet look, food coloring is essential. You can adjust the amount depending on how vibrant you want the cake to be.
Cream Cheese Frosting: A mix of cream cheese, butter, powdered sugar, and vanilla makes for a tangy and sweet frosting that pairs perfectly with the cake.
Red Velvet Cake Recipe
Ingredients:
2 1/2 cups all-purpose flour
1 1/2 cups granulated sugar
1 teaspoon baking soda
1 teaspoon fine salt
1 teaspoon cocoa powder
1 1/2 cups vegetable oil
1 cup buttermilk, at room temperature
2 large eggs, at room temperature
2 tablespoons red food coloring (adjust to desired color)
1 teaspoon white vinegar
1 teaspoon vanilla extract
For the Cream Cheese Frosting:
1 pound cream cheese, softened
2 sticks unsalted butter, softened
4 cups sifted powdered sugar
1 teaspoon vanilla extract
Directions:
Preheat Oven and Prepare Pans: Preheat your oven to 350°F (175°C). Grease and flour two 9-inch round cake pans.
Mix Dry Ingredients: In a medium bowl, sift together flour, sugar, baking soda, salt, and cocoa powder.
Combine Wet Ingredients: In a large bowl, whisk together oil, buttermilk, eggs, food coloring, vinegar, and vanilla until well blended.
Combine Wet and Dry Ingredients: Gradually add the dry ingredients to the wet ingredients, mixing until smooth and well combined.
Bake: Pour the batter evenly into the prepared pans. Bake for 25-30 minutes, or until a toothpick inserted into the center comes out clean.
Cool and Frost: Allow the cakes to cool in the pans for 10 minutes, then transfer to a wire rack to cool completely. Once cooled, frost with cream cheese frosting.
Assemble: If you baked in layers, spread frosting between each layer, then cover the top and sides of the cake with frosting.
Red velvet cake is not just a dessert; it’s a celebration of flavor, texture, and color. Whether for a special occasion or a simple treat, baking a red velvet cake from scratch offers a rewarding and delicious experience. Enjoy the process and the inevitable delight of those who get to share in this iconic dessert.
Perfecting Your Red Velvet Cake: Tips and Tricks
While the recipe provided is a great starting point, here are some additional tips and tricks to ensure your red velvet cake turns out perfectly every time:
Ingredient Temperature: Make sure all your ingredients, especially the buttermilk and eggs, are at room temperature before you start mixing. This helps to ensure a smooth, evenly mixed batter that results in a cake with a uniform texture.
Quality of Cocoa Powder: The type of cocoa powder you use can affect both the flavor and color of your cake. Natural unsweetened cocoa powder is recommended for its acidity, which reacts well with the buttermilk and vinegar, enhancing the cake’s red color.
Mixing Method: When combining your wet and dry ingredients, be careful not to overmix. Overmixing can lead to a dense, tough cake rather than a light, fluffy one. Mix just until the dry ingredients are fully incorporated.
Using Food Coloring: The amount and type of food coloring can greatly impact the cake’s appearance. Gel food coloring tends to be more concentrated and can give a deeper color without adding too much liquid to the batter. Start with a small amount and adjust according to the color intensity you prefer.
Baking Time and Temperature: Oven temperatures can vary, so it’s a good idea to check the cake a few minutes before the recommended baking time. A cake tester or toothpick should come out clean when inserted into the center of the cake.
Cooling: Allowing the cakes to cool completely before frosting is crucial. Frosting a warm cake can lead to melted frosting and a messy presentation. If time allows, consider cooling the cakes in the refrigerator to firm them up before frosting, making them easier to handle.
Frosting: For a smooth frosting application, consider applying a thin “crumb coat” of frosting to the cake first. This initial layer catches any loose crumbs. Chill the cake for 15-30 minutes to set this layer, then apply the final coating of frosting for a clean, professional finish.
Decoration: Red velvet cake offers a beautiful canvas for decoration. Consider garnishes like fresh berries, chocolate shavings, or even a dusting of cocoa powder to enhance its appearance. Red velvet cake crumbs can also be crumbled and sprinkled around the base or on top for an elegant touch.
Serving and Storing
Red velvet cake is best served at room temperature, where its flavors and textures can be fully appreciated. If you’ve refrigerated the cake, take it out an hour or two before serving to allow it to come to room temperature.
For storing leftovers, cover the cake tightly with plastic wrap or keep it in an airtight container. It can be stored in the refrigerator for up to a week. For longer storage, consider freezing the cake. Wrap individual slices or the whole cake securely in plastic wrap and then in foil. Frozen red velvet cake can last for 2-3 months. Thaw overnight in the refrigerator before serving.
Baking a red velvet cake from scratch is a rewarding experience that combines the joys of baking with the delight of serving a visually stunning and deliciously rich dessert. By following the recipe and tips provided, you can create a cake that’s not only a treat for the taste buds but also a feast for the eyes. Whether for a special occasion or as a treat for yourself and loved ones, a homemade red velvet cake is sure to be a memorable delight.