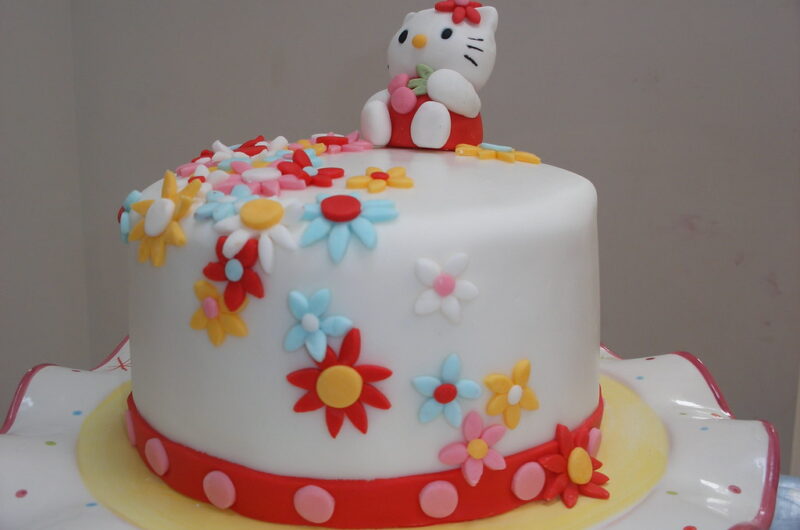
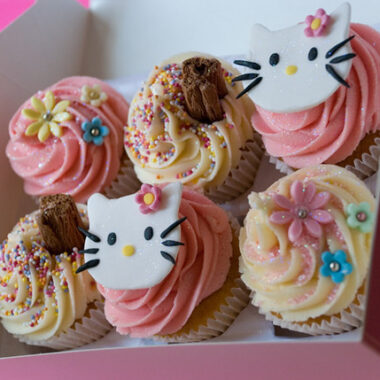
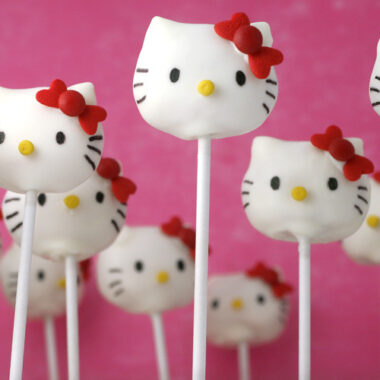
Since her debut in 1974 by the Japanese company Sanrio, Hello Kitty has captured hearts worldwide with her simple yet adorable design: a white kitten with a red bow, no mouth, and a timeless appeal. What began as a character on a vinyl coin purse has grown into a global phenomenon, inspiring everything from fashion to home décor—and, of course, food. Among the most delightful ways to celebrate Hello Kitty is through baking, particularly with Hello Kitty-themed cakes. These cakes are perfect for birthdays, themed parties, or simply as a fun weekend project for fans of all ages.
In this article, we’ll dive into the world of Hello Kitty cake recipes, offering a variety of options—from a classic vanilla cake with fondant decorations to a no-bake cheesecake version. Whether you’re a seasoned baker or a beginner, these recipes will help you create a purr-fectly adorable treat. We’ll also share tips for decorating and customizing your cake to capture Hello Kitty’s signature charm.
Why Hello Kitty Cakes?
Hello Kitty’s minimalist design—round face, small black eyes, tiny nose, and that iconic bow—lends itself beautifully to cake decorating. Her image is instantly recognizable, making her a popular choice for themed desserts. Plus, her association with cuteness and positivity makes Hello Kitty cakes a hit for celebrations, especially for children or fans of kawaii culture.
Baking a Hello Kitty cake is more than just a culinary task—it’s a creative outlet. You can experiment with flavors, colors, and techniques while paying homage to a character that has brought joy to millions. Below, we’ll explore three distinct Hello Kitty cake recipes: a classic vanilla layer cake, a chocolate sponge cake with buttercream, and a no-bake Hello Kitty cheesecake. Each recipe includes detailed instructions and decorating tips to ensure your cake looks as good as it tastes.
Recipe 1: Hello Kitty Vanilla Layer Cake with Fondant
Ingredients
For the Cake:
- 2 ½ cups (300g) all-purpose flour
- 2 ½ tsp baking powder
- ½ tsp salt
- 1 cup (225g) unsalted butter, softened
- 1 ¾ cups (350g) granulated sugar
- 4 large eggs
- 1 tbsp vanilla extract
- 1 cup (240ml) whole milk
For the Buttercream Frosting:
- 1 cup (225g) unsalted butter, softened
- 4 cups (480g) powdered sugar
- 2-3 tbsp heavy cream
- 1 tsp vanilla extract
- Pinch of salt
For Decoration:
- 1 lb (450g) white fondant
- Red food coloring (for the bow)
- Black food coloring (for the eyes and whiskers)
- Yellow food coloring (for the nose)
- Cornstarch (for dusting)
- Hello Kitty face template (optional, printable online)
Equipment
- Two 8-inch round cake pans
- Rolling pin
- Small knife or fondant tools
- Piping bags (optional)
Instructions
Step 1: Bake the Cake
- Preheat your oven to 350°F (175°C). Grease and line two 8-inch round cake pans with parchment paper.
- In a medium bowl, whisk together flour, baking powder, and salt. Set aside.
- In a large bowl, beat the butter and sugar with an electric mixer until light and fluffy (about 3-4 minutes).
- Add eggs one at a time, beating well after each addition. Mix in the vanilla extract.
- Gradually add the dry ingredients to the wet mixture, alternating with the milk. Begin and end with the dry ingredients (flour-milk-flour-milk-flour). Mix until just combined.
- Divide the batter evenly between the prepared pans. Bake for 25-30 minutes, or until a toothpick inserted into the center comes out clean.
- Let the cakes cool in the pans for 10 minutes, then transfer to a wire rack to cool completely.
Step 2: Prepare the Buttercream
- Beat the softened butter in a large bowl until creamy.
- Gradually add the powdered sugar, 1 cup at a time, mixing well after each addition.
- Add the vanilla extract, salt, and 2 tablespoons of heavy cream. Beat on high speed for 2-3 minutes until light and fluffy. Add more cream if needed for a spreadable consistency.
Step 3: Assemble the Cake
- Level the tops of the cooled cakes with a serrated knife if they’ve domed.
- Place one cake layer on a serving plate or cake board. Spread a layer of buttercream over the top.
- Add the second cake layer and cover the entire cake with a thin layer of buttercream (a crumb coat). Chill for 20 minutes.
- Apply a final smooth layer of buttercream over the cake.
Step 4: Decorate with Fondant
- Dust a clean surface with cornstarch. Roll out the white fondant to about ¼-inch thickness.
- Carefully drape the fondant over the cake, smoothing it with your hands or a fondant smoother. Trim excess fondant from the base.
- For Hello Kitty’s face: Use a template or freehand cut her round face shape from fondant. Place it on the cake’s surface.
- Dye a small portion of fondant red and shape it into a bow. Attach it to the top left of her head with a dab of water or edible glue.
- Dye tiny amounts of fondant black (for eyes and whiskers) and yellow (for the nose). Roll small balls for the eyes and nose, and thin strips for the whiskers. Position them on the face.
Tips
- If fondant feels intimidating, use white chocolate melts to create Hello Kitty’s face instead.
- Practice shaping the bow and facial features on a small piece of fondant first.
Recipe 2: Hello Kitty Chocolate Sponge Cake with Buttercream
Ingredients
For the Cake:
- 1 ¾ cups (210g) all-purpose flour
- ¾ cup (75g) unsweetened cocoa powder
- 2 tsp baking powder
- ½ tsp baking soda
- ½ tsp salt
- 1 cup (200g) granulated sugar
- ½ cup (110g) unsalted butter, softened
- 2 large eggs
- 1 tsp vanilla extract
- 1 cup (240ml) buttermilk
For the Buttercream:
- Same as Recipe 1, but add ½ cup (50g) cocoa powder for chocolate flavor
For Decoration:
- White chocolate melts (for the face)
- Red candy melts (for the bow)
- Black piping gel (for eyes and whiskers)
- Yellow candy (like an M&M) or fondant (for the nose)
Instructions
Step 1: Bake the Cake
- Preheat oven to 350°F (175°C). Grease and line two 8-inch round pans.
- Sift flour, cocoa powder, baking powder, baking soda, and salt into a bowl.
- In a separate bowl, cream butter and sugar until fluffy. Add eggs one at a time, then vanilla.
- Alternate adding dry ingredients and buttermilk to the wet mixture, mixing until smooth.
- Divide batter between pans and bake for 22-25 minutes. Cool completely.
Step 2: Make the Chocolate Buttercream
- Follow the buttercream instructions from Recipe 1, adding cocoa powder with the powdered sugar.
Step 3: Assemble and Frost
- Level the cakes, stack with buttercream between layers, and apply a crumb coat. Chill, then frost with a smooth layer.
Step 4: Decorate
- Melt white chocolate and spread it into a thin, round shape on parchment paper for Hello Kitty’s face. Let it set.
- Melt red candy melts and pipe or mold into a bow shape. Let harden.
- Once set, place the white chocolate face on the cake. Add the red bow above it.
- Use black piping gel to draw eyes and whiskers. Add a yellow candy or fondant piece for the nose.
Tips
- For a richer flavor, add a splash of coffee to the batter—it enhances the chocolate without overpowering it.
- Use a Hello Kitty silicone mold for precise chocolate shapes if available.
Recipe 3: No-Bake Hello Kitty Cheesecake
Ingredients
For the Crust:
- 2 cups (200g) graham cracker crumbs
- ½ cup (115g) unsalted butter, melted
For the Filling:
- 16 oz (450g) cream cheese, softened
- 1 cup (120g) powdered sugar
- 1 tsp vanilla extract
- 1 ½ cups (360ml) heavy cream, whipped
- Red food coloring (optional, for a pink swirl)
For Decoration:
- Whipped cream
- Hello Kitty cookies or candies (store-bought or homemade)
- Sprinkles (optional)
Instructions
Step 1: Make the Crust
- Mix graham cracker crumbs and melted butter until combined.
- Press the mixture into the bottom of an 8-inch springform pan. Chill for 30 minutes.
Step 2: Prepare the Filling
- Beat cream cheese, powdered sugar, and vanilla until smooth.
- Fold in whipped cream gently until fully incorporated.
- Optional: Add a few drops of red food coloring and swirl with a toothpick for a pink effect.
- Spread the filling over the crust. Chill for at least 4 hours or overnight.
Step 3: Decorate
- Remove the cheesecake from the pan. Pipe whipped cream swirls around the edge.
- Place Hello Kitty cookies or candies on top. Add sprinkles for extra flair.
Tips
- Look for Hello Kitty-themed edible toppers online or at baking stores.
- For a lighter texture, whip the cream to soft peaks before folding.
Decorating Tips for Hello Kitty Cakes
- Templates: Print a Hello Kitty face outline to guide your cutting or piping.
- Colors: Stick to her classic palette—white, red, black, and yellow—or experiment with pastel shades for a unique twist.
- Tools: Invest in small piping tips or fondant tools for precision.
- Practice: Test your design on parchment paper before applying it to the cake.
Conclusion
Hello Kitty cakes are a delightful way to combine baking with fandom. Whether you opt for a traditional vanilla cake, a rich chocolate version, or a creamy no-bake cheesecake, these recipes offer something for every skill level and occasion. With a little creativity and patience, you can bring this beloved character to life in edible form, making your next celebration extra special. So grab your apron, channel your inner kawaii, and bake a Hello Kitty cake that’s as cute as it is delicious!
