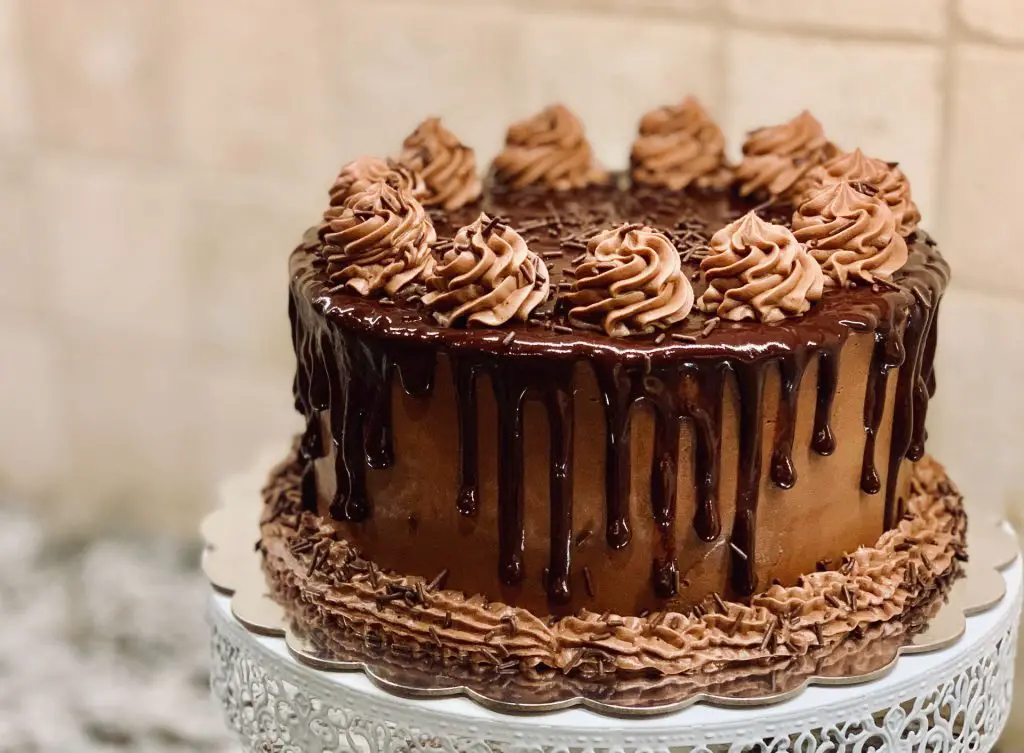
Chocolate cake is a beloved dessert that never goes out of style. Its rich, moist, and decadent flavor makes it a favorite for birthdays, anniversaries, and any other special occasion. However, you don’t need a special reason to enjoy a slice of chocolate cake; sometimes, a simple craving is enough! In this article, we will walk you through the step-by-step process of making a simple yet scrumptious chocolate cake that will satisfy your sweet tooth and impress your friends and family.
Ingredients
Before you start baking your chocolate cake, gather all the necessary ingredients. Here’s what you’ll need:
For the cake:
1¾ cups all-purpose flour
1¾ cups granulated sugar
¾ cup unsweetened cocoa powder
1½ tsp baking powder
1½ tsp baking soda
1 tsp salt
2 large eggs
1 cup buttermilk
½ cup vegetable oil
2 tsp pure vanilla extract
1 cup boiling water
For the chocolate frosting:
1 cup unsalted butter, softened
2 cups confectioners’ sugar
¾ cup unsweetened cocoa powder
⅔ cup milk
1 tsp pure vanilla extract
Now that you have all the ingredients ready, let’s dive into the process of making your simple chocolate cake.
Step 1: Preheat the Oven
Preheat your oven to 350°F (175°C). While the oven is heating up, prepare your cake pans. You can use two 9-inch round cake pans, greasing and flouring them to ensure the cakes don’t stick.
Step 2: Mix Dry Ingredients
In a large mixing bowl, sift together the all-purpose flour, granulated sugar, unsweetened cocoa powder, baking powder, baking soda, and salt. Sifting these dry ingredients will help eliminate lumps and ensure a smooth batter.
Step 3: Combine Wet Ingredients
In another bowl, whisk together the eggs, buttermilk, vegetable oil, and pure vanilla extract. Mixing the wet ingredients separately before incorporating them into the dry ingredients ensures a more uniform batter.
Step 4: Create the Cake Batter
Now, gradually add the wet ingredients to the dry ingredients while stirring continuously. Keep mixing until the batter is smooth and well combined. Be careful not to overmix, as this can make the cake tough.
Step 5: Add Boiling Water
This might sound unusual, but adding boiling water to the batter is a crucial step in achieving the cake’s moist texture. Slowly pour in the boiling water while continuing to stir the batter. The batter will become thin, but that’s perfectly normal.
Step 6: Pour and Bake
Divide the cake batter evenly between your prepared cake pans. Tap the pans on the counter a few times to remove any air bubbles. Place the pans in the preheated oven and bake for approximately 30-35 minutes, or until a toothpick inserted into the center of the cakes comes out clean.
Step 7: Cool the Cakes
Once the cakes are done baking, remove them from the oven and let them cool in the pans for about 10 minutes. Then, gently run a knife around the edges to loosen the cakes and turn them out onto a wire rack to cool completely.
While the cakes are cooling, you can start preparing the chocolate frosting.
Step 8: Make the Chocolate Frosting
In a medium-sized bowl, sift together the confectioners’ sugar and unsweetened cocoa powder to remove any lumps. In a separate bowl, beat the softened butter until it’s creamy and smooth. Gradually add the sifted dry ingredients, milk, and pure vanilla extract to the butter, and continue to beat until the frosting is smooth and fluffy. If the frosting is too thick, you can add a little more milk, and if it’s too thin, you can add more confectioners’ sugar.
Step 9: Assemble the Cake
Once the cakes have cooled completely, it’s time to assemble your chocolate cake. Place one of the cake layers on a serving plate or cake stand, and spread a generous layer of chocolate frosting on top. Carefully place the second cake layer on top and frost the top and sides of the entire cake.
Step 10: Decorate (Optional)
Feel free to get creative with your cake decoration. You can use chocolate shavings, sprinkles, or even fresh berries to add a personal touch to your cake. Remember, presentation matters, so take your time to make it look as appealing as possible.
Step 11: Slice and Enjoy
Now that your simple chocolate cake is ready, it’s time to slice and enjoy! Grab a sharp knife, cut yourself a generous piece, and savor every bite of this delicious homemade treat.
Tips for Success
Use room temperature ingredients: Make sure your eggs, buttermilk, and butter are at room temperature to ensure a smooth batter and frosting.
Properly measure your dry ingredients: Spoon your flour and cocoa powder into the measuring cups and level them off with a knife. This will help you avoid using too much, which can lead to a dense cake.
Don’t overmix the batter: Mix the batter until just combined to avoid overworking the gluten in the flour, which can result in a tough cake.
Cool the cakes completely before frosting: If you frost the cakes while they’re still warm, the frosting can melt and slide off the cake.
Experiment with variations: You can customize your chocolate cake by adding chocolate chips, chopped nuts, or even a touch of espresso powder to the batter for extra flavor.
Making a simple chocolate cake from scratch is a delightful experience that rewards you with a delectable dessert perfect for any occasion or no occasion at all. With the right ingredients, a bit of patience, and some creativity in decoration, you can create a moist and flavorful chocolate cake that will have everyone asking for seconds. So, roll up your sleeves, preheat that oven, and get ready to enjoy a slice of homemade chocolate heaven. Happy baking!
Additional Tips and Variations
Chocolate Ganache: If you’re a true chocolate lover, consider making a chocolate ganache to pour over your cake. Simply heat equal parts of heavy cream and chocolate chips (e.g., 1 cup each) until the chocolate is melted and the mixture is smooth. Allow it to cool slightly, then pour it over the frosted cake for a glossy, indulgent finish.
Fillings: Add a surprise filling to your chocolate cake. Some popular options include raspberry jam, peanut butter, or a layer of whipped cream with chopped strawberries.
Gluten-Free Option: If you or your loved ones have dietary restrictions, you can make this cake gluten-free by using a gluten-free all-purpose flour blend. Just ensure it’s a suitable 1:1 replacement for regular flour.
Vegan Chocolate Cake: To make a vegan version of this cake, replace the eggs with flax eggs (1 tbsp ground flaxseed mixed with 3 tbsp water for each egg) and use dairy-free buttermilk (made by mixing dairy-free milk with a splash of vinegar or lemon juice). Use dairy-free milk and vegan butter in the frosting as well.
Nutty Twist: Enhance the flavor and texture by adding chopped nuts like walnuts or pecans to the batter. Fold them in just before pouring the batter into the cake pans.
Coffee-Infused: For a deeper chocolate flavor, replace some of the boiling water with brewed coffee. The coffee enhances the chocolate’s richness without making the cake taste like coffee.
Mint Chocolate: Infuse your cake with a refreshing twist by adding a few drops of peppermint extract to the batter or frosting. The combination of mint and chocolate is a classic favorite.
Layered Designs: Experiment with different layer designs. You can make a classic two-layer cake or go for a more extravagant three or four layers for special occasions. Just be sure to adjust the frosting accordingly.
Storing Your Chocolate Cake
Properly storing your chocolate cake will keep it fresh and delicious for days:
Room Temperature: If you plan to consume the cake within a day or two, you can store it at room temperature, covered with a cake dome or plastic wrap. Make sure the room is not too warm to prevent the frosting from melting.
Refrigeration: If you’re keeping the cake for longer or if it’s a hot day, refrigeration is a better option. Store it in an airtight container or cake carrier to prevent it from absorbing any other odors in the fridge.
Freezing: Chocolate cake freezes exceptionally well. Wrap individual slices or the whole cake tightly in plastic wrap, followed by aluminum foil, and store it in the freezer for up to three months. To thaw, simply leave it in the refrigerator overnight.
Making a simple chocolate cake from scratch is a satisfying and rewarding endeavor. With the right ingredients, a little patience, and a touch of creativity, you can create a decadent dessert that will delight your taste buds and impress your friends and family. Whether you’re celebrating a special occasion or just satisfying a chocolate craving, this homemade chocolate cake recipe is a timeless classic that never goes out of style.
So, don your apron, gather your ingredients, and embark on the delightful journey of baking your own chocolate cake. The aroma wafting from your oven and the smiles on the faces of those you share it with will make it all worth it.


