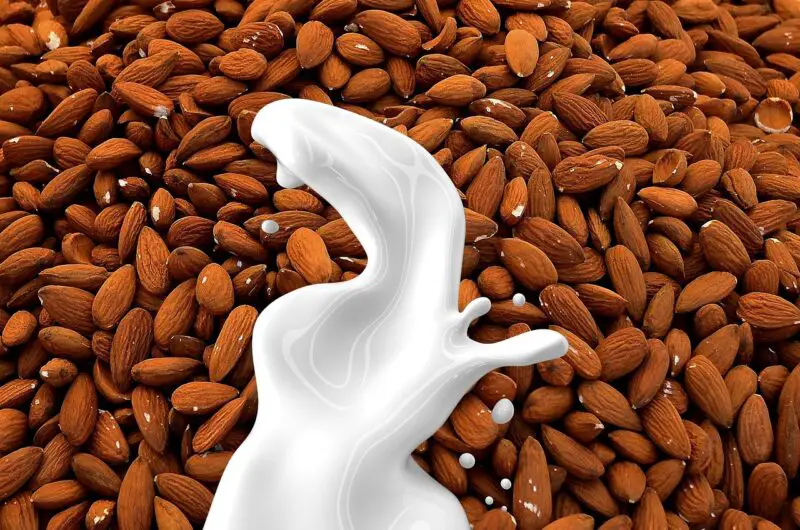
In recent years, plant-based milk alternatives have surged in popularity, lining grocery store shelves with options like almond, oat, and cashew milk. Whether you’re lactose intolerant, vegan, or simply looking to reduce your environmental footprint, nut and grain-based milks offer a creamy, versatile substitute for dairy. But here’s the secret: you don’t need to rely on store-bought versions. Making your own nut milk at home is surprisingly simple, cost-effective, and allows you to control exactly what goes into it—no preservatives, artificial flavors, or mysterious stabilizers required.
This comprehensive guide will walk you through the process of making three popular types of nut milk—almond, oat, and cashew—from scratch. We’ll cover the benefits of homemade nut milk, the tools you’ll need, step-by-step instructions, flavoring options, troubleshooting tips, and creative ways to use the leftovers. By the end, you’ll be equipped to whip up a batch of fresh, delicious nut milk tailored to your taste.
Why Make Your Own Nut Milk?
Before diving into the how-to, let’s explore why homemade nut milk is worth your time. Store-bought versions often come with additives like gums, emulsifiers, and sweeteners to enhance texture and shelf life. While these ingredients aren’t necessarily harmful, they can alter the taste and nutritional profile. When you make nut milk at home, you get:
- Purity: You decide what goes in—nuts or oats, water, and optional flavors. No hidden ingredients.
- Cost Savings: A pound of almonds, oats, or cashews costs far less than multiple cartons of pre-made milk.
- Customization: Adjust the thickness, sweetness, or flavor to suit your preferences.
- Sustainability: Skip the packaging waste and reduce your carbon footprint.
- Freshness: Homemade nut milk tastes brighter and more vibrant than its store-bought counterparts.
Plus, it’s a fun kitchen project that takes less than 30 minutes once you get the hang of it. Ready to get started? Let’s gather the essentials.
Tools and Ingredients You’ll Need
The beauty of making nut milk lies in its simplicity—you don’t need fancy equipment or rare ingredients. Here’s what you’ll want on hand:
Tools:
- Blender: A high-speed blender (like a Vitamix or Blendtec) works best, but a standard blender will do.
- Nut Milk Bag or Cheesecloth: For straining the milk. A fine-mesh sieve can work in a pinch.
- Large Bowl: To catch the strained liquid.
- Measuring Cups and Spoons: For precision.
- Glass Jar or Bottle: For storing your finished milk (mason jars are perfect).
- Spoon or Spatula: To stir and scrape.
Base Ingredients:
- Almonds: 1 cup raw, unsalted almonds (preferably organic).
- Oats: 1 cup rolled oats (not instant or steel-cut).
- Cashews: 1 cup raw, unsalted cashews.
- Water: 3–4 cups Filtered or spring water, depending on desired thickness.
- Pinch of Salt: Enhances flavor (optional).
Optional Add-ins:
- Sweeteners: 1–2 teaspoons of maple syrup, honey, or 1–2 pitted dates.
- Flavorings: Vanilla extract (1 tsp), cinnamon (½ tsp), or cocoa powder (1 tbsp).
- Fortification: A pinch of calcium powder or a splash of plant-based creamer for richness.
With these basics, you’re ready to make almond, oat, or cashew milk. Let’s break it down step by step for each type.
How to Make Almond Milk
Almond milk is a classic, known for its subtle nutty flavor and smooth texture. It’s a staple in coffee, smoothies, and baked goods. Here’s how to make it:
Step 1: Soak the Almonds
- Place 1 cup of raw almonds in a bowl and cover with water.
- Let them soak for 8–12 hours (overnight is ideal). This softens the almonds, making them easier to blend and digest while reducing bitterness from the skins.
- If you’re short on time, soak them in hot water for 1–2 hours.
Step 2: Rinse and Drain
- After soaking, drain the almonds and rinse them under cold water. This removes any residual phytic acid (an “anti-nutrient” that can inhibit mineral absorption).
Step 3: Blend
- Add the soaked almonds to your blender with 3–4 cups of fresh water. Use 3 cups for a creamier milk or 4 cups for a lighter consistency.
- Blend on high for 1–2 minutes until the mixture looks milky and the almonds are finely ground.
Step 4: Strain
- Place a nut milk bag or cheesecloth over a large bowl. Pour the almond mixture into the bag and gently squeeze to extract the milk. The liquid is your almond milk; the leftover pulp is almond meal (save it!).
Step 5: Flavor (Optional)
- Pour the strained milk back into the blender. Add a pinch of salt, 1 teaspoon of vanilla extract, or a sweetener of your choice. Blend briefly to combine.
Step 6: Store
- Transfer the almond milk to a glass jar and refrigerate. It’ll stay fresh for 3–5 days. Shake before using, as it may separate naturally.
Yield: About 3–4 cups, depending on water ratio.
How to Make Oat Milk
Oat milk has exploded in popularity thanks to its creamy texture and mild, slightly sweet flavor—perfect for lattes or cereal. It’s also the quickest to make since it skips the long soaking step.
Step 1: Rinse the Oats
- Place 1 cup of rolled oats in a bowl and rinse briefly under water. This removes excess starch that can make the milk slimy.
Step 2: Blend
- Add the rinsed oats to a blender with 3–4 cups of cold water. (Cold water helps prevent the oats from heating up and becoming gummy.)
- Blend on high for 20–30 seconds—don’t overblend, or the milk will thicken too much.
Step 3: Strain
- Pour the mixture through a nut milk bag or cheesecloth into a bowl. Squeeze gently to separate the milk from the oat pulp. (The pulp can be repurposed—more on that later.)
Step 4: Flavor (Optional)
- Return the milk to the blender. Add a pinch of salt, 1 teaspoon of vanilla, or a sweetener like maple syrup. Blend for a few seconds to mix.
Step 5: Store
- Pour into a jar and refrigerate. Oat milk lasts 3–5 days and may separate—give it a shake before pouring.
Yield: 3–4 cups.
Note: Oat milk can get slimy if overprocessed or heated too much during blending. Keep it quick and cold for the best results.
How to Make Cashew Milk
Cashew milk is the creamiest of the trio, with a rich, velvety texture that rivals dairy. It’s ideal for sauces, desserts, or drinking straight.
Step 1: Soak the Cashews
- Place 1 cup of raw cashews in a bowl and cover with water.
- Soak for 4–6 hours (or 30 minutes in hot water if you’re in a rush). This softens them for blending.
Step 2: Rinse and Drain
- Drain and rinse the cashews under cold water to remove any residue.
Step 3: Blend
- Add the cashews to a blender with 3–4 cups of water. Blend on high for 1–2 minutes until smooth and creamy.
Step 4: Strain (Optional)
- Cashew milk is naturally smoother than almond or oat milk, so straining is optional. If you prefer it silkier, use a nut milk bag or cheesecloth. Otherwise, skip to flavoring.
Step 5: Flavor (Optional)
- Add a pinch of salt, vanilla, or a sweetener. Blend briefly to incorporate.
Step 6: Store
- Pour into a jar and refrigerate for up to 4–5 days. Shake before use.
Yield: 3–4 cups.
Pro Tip: Cashew milk’s thickness makes it a fantastic base for vegan ice cream or creamy soups.
Troubleshooting Common Issues
Making nut milk is straightforward, but small hiccups can arise. Here’s how to fix them:
- Too Thin? Use less water next time (e.g., 3 cups instead of 4).
- Too Thick? Add more water gradually and blend again.
- Gritty Texture? Blend longer or strain twice through a finer mesh.
- Slimy Oat Milk? Don’t overblend, and use cold water.
- Separation? Normal! Shake well before serving.
Creative Flavor Variations
Once you’ve mastered the basics, experiment with these add-ins:
- Chocolate: Blend in 1 tablespoon cocoa powder + 1–2 teaspoons sweetener.
- Cinnamon Spice: Add ½ teaspoon cinnamon + a dash of nutmeg.
- Matcha: Mix in 1 teaspoon matcha powder for a green boost.
- Berry Blast: Blend with ¼ cup fresh berries (strain again if needed).
What to Do with the Leftovers
The pulp left after straining—almond meal, oat pulp, or cashew grounds—doesn’t have to go to waste. Try these ideas:
- Baking: Add almond or cashew pulp to cookies, muffins, or granola bars.
- Smoothies: Toss oat or almond pulp into your next blend for fiber.
- DIY Face Scrub: Mix almond meal with honey for a gentle exfoliant.
- Crackers: Combine pulp with spices, shape, and bake into savory snacks.
Nutritional Breakdown
Here’s a quick look at the approximate nutrition per cup (unsweetened, made with 1 cup nuts/oats and 4 cups water):
- Almond Milk: 30–40 calories, 2.5g fat, 1g protein.
- Oat Milk: 60–80 calories, 1g fat, 2g carbs, 1g protein.
- Cashew Milk: 50–60 calories, 4g fat, 1g protein.
Values vary based on water ratio and add-ins. Homemade versions typically have fewer calories than store-bought, which often include thickeners and sugars.
Uses for Your Homemade Nut Milk
Your fresh nut milk is incredibly versatile:
- Pour it over cereal or granola.
- Froth it for lattes or cappuccinos (oat milk shines here).
- Use it in baking—pancakes, cakes, or bread.
- Blend it into smoothies or soups.
- Sip it plain or flavored as a refreshing drink.
Final Thoughts
Making your own almond, oat, or cashew milk is a rewarding skill that saves money, reduces waste, and delivers unbeatable freshness. With minimal ingredients and a little practice, you can craft a plant-based milk that’s perfectly suited to your taste buds. Whether you’re Team Almond for its nutty elegance, Team Oat for its coffee-shop vibes, or Team Cashew for its indulgent creaminess, the process is yours to tweak and enjoy.
So, grab some nuts or oats, fire up your blender, and give it a whirl. Once you taste the difference, you might never go back to the carton stuff again.
References
- McGee, H. (2004). On Food and Cooking: The Science and Lore of the Kitchen. Scribner.
- A comprehensive resource on food science, including the chemistry of nuts and plant-based milk alternatives.
- Nestle, M. (2013). Food Politics: How the Food Industry Influences Nutrition and Health. University of California Press.
- Offers insight into the additives in commercial plant-based milks, supporting the case for homemade versions.
- The Almond Board of California. (n.d.). Nutritional Information on Almonds. Retrieved from https://www.almonds.com
- Provides nutritional data on almonds, useful for the breakdown of almond milk’s profile.
- Oatly. (2023). The Oat Milk Handbook. Retrieved from https://www.oatly.com
- A commercial source with general guidance on oat milk production, reflecting industry standards adaptable to home methods.
- Davidson, A. (2014). The Oxford Companion to Food. Oxford University Press.
- Covers the history and preparation of nut- and grain-based milks across cultures.
- United States Department of Agriculture (USDA). (2025). FoodData Central. Retrieved from https://fdc.nal.usda.gov
- A reliable database for approximate nutritional values of almonds, oats, and cashews used in the article.
- Minimalist Baker. (2020). How to Make Nut Milk: A Simple Guide. Retrieved from https://minimalistbaker.com
- A popular online resource with practical recipes and tips for homemade nut milks, aligning with the article’s methods.


