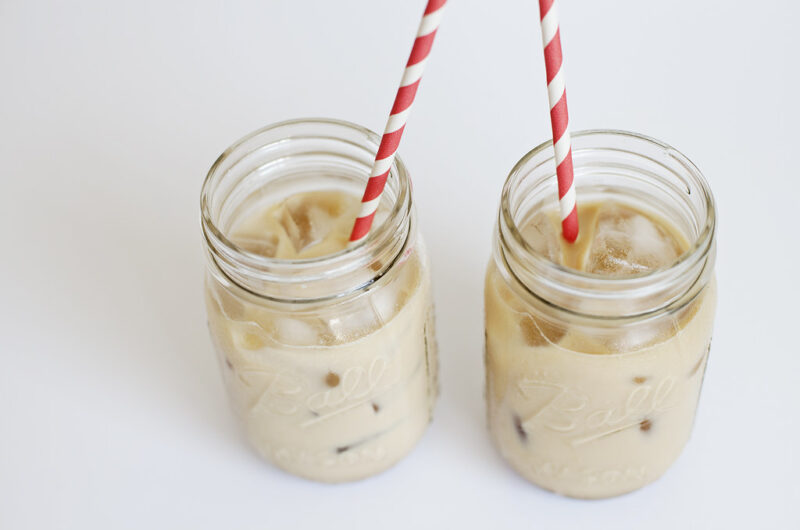
Cold brew coffee has taken the world by storm, offering a smooth, rich, and refreshing alternative to traditional hot coffee. Unlike iced coffee, which is brewed hot and then cooled, cold brew is made by steeping coffee grounds in cold water for an extended period. The result? A less acidic, naturally sweeter coffee concentrate that’s versatile enough to enjoy straight, diluted, or jazzed up with your favorite add-ins. Best of all, you don’t need a fancy coffee shop or expensive equipment to make it—just a little time, patience, and some basic tools you likely already have at home.
In this comprehensive guide, we’ll walk you through everything you need to know to make cold brew coffee at home.
From choosing the right beans to mastering the brewing process, troubleshooting common issues, and even exploring creative recipes, you’ll be sipping your own barista-quality cold brew in no time. Let’s dive in!
Why Cold Brew?
Before we get into the nitty-gritty, let’s talk about why cold brew is worth your time. The slow extraction process—typically 12 to 24 hours—pulls out the coffee’s bold flavors while leaving behind much of the bitterness and acidity that can come with hot brewing. This makes cold brew easier on the stomach and a fantastic base for customizing.
Whether you like it black, creamy, or sweetened, cold brew adapts to your taste. Plus, it’s a make-ahead dream: brew a big batch, store it in the fridge, and you’ve got coffee ready to go for days.
What You’ll Need
Making cold brew at home is delightfully simple, and the equipment list is minimal. Here’s what you’ll need:
- Coffee Beans: Fresh, coarsely ground coffee is key. More on choosing the right beans later.
- Cold Water: Filtered water is ideal for the cleanest taste.
- A Container: A large mason jar, pitcher, or French press works great.
- A Filter: Cheesecloth, a fine-mesh sieve, paper coffee filters, or even a clean kitchen towel will do.
- A Grinder (Optional): If you’re starting with whole beans, a grinder set to a coarse setting is best.
- Time: Patience is your secret ingredient—cold brew needs 12-24 hours to steep.
Optional extras: a scale for precise measurements, a stirring utensil, and a fridge for storage.
Step-by-Step: How to Make Cold Brew Coffee
Here’s the basic process to make cold brew at home. We’ll break it down into manageable steps, then dive deeper into tips and variations.
Step 1: Choose and Grind Your Coffee
The foundation of great cold brew is great coffee. Opt for medium-to-dark roast beans, as they bring out the chocolatey, nutty notes that shine in cold brew. Light roasts can work too, offering fruitier flavors, but they might need a little experimentation to get right.
Grind your beans to a coarse consistency—think the texture of coarse sea salt. Too fine, and your brew will be cloudy and gritty; too coarse, and it might lack flavor. If you don’t have a grinder, many stores will grind beans for you—just ask for a coarse setting. A good starting ratio is 1:4 (1 part coffee to 4 parts water by volume), but you can adjust this later to suit your taste.
For a single batch (about 4 cups of concentrate), use:
- 1 cup (about 100-120 grams) of coarsely ground coffee
- 4 cups (32 ounces) of cold water
Step 2: Combine Coffee and Water
In your chosen container—a mason jar or pitcher works well—add the coarsely ground coffee. Slowly pour in the cold water, ensuring all the grounds are fully saturated. Stir gently with a spoon or spatula to break up any clumps. The goal is even exposure of the grounds to the water.
Pro tip: If you’re using a French press, this step is even easier—just add the coffee and water to the press, stir, and let it sit without pressing the plunger yet.
Step 3: Steep
Cover your container (a lid, plastic wrap, or cloth secured with a rubber band works) and let it steep at room temperature or in the fridge. The steeping time is where the magic happens:
- 12-18 hours: A lighter, smoother brew.
- 18-24 hours: A stronger, more robust concentrate.
Room temperature steeping tends to extract flavors faster, while fridge steeping keeps things cooler and can reduce oxidation. Experiment to see what you prefer, but avoid going past 24 hours—over-steeping can make the brew bitter.
Step 4: Filter
Once steeping is complete, it’s time to separate the grounds from the liquid. If you’re using a French press, simply press down the plunger and pour. For other containers, set up your filtering system:
- Place a fine-mesh sieve lined with cheesecloth or a coffee filter over a clean pitcher or bowl.
- Slowly pour the coffee mixture through, letting it strain naturally. You might need to do this in batches or replace the filter if it clogs.
Be patient—rushing this step can leave sediment in your brew. If it’s still cloudy, strain a second time.
Step 5: Store and Serve
Your cold brew is now a concentrate, stronger than regular coffee. Transfer it to a clean, airtight container (like a jar or bottle) and store it in the fridge. It’ll stay fresh for up to two weeks, though it’s best within the first week for peak flavor.
To serve, dilute the concentrate with water, milk, or a plant-based alternative. A common ratio is 1:1 (equal parts concentrate and liquid), but adjust to your liking. Serve over ice, and add sweeteners, cream, or flavors if desired.
Tips for Perfecting Your Cold Brew
Now that you’ve got the basics down, let’s refine your technique with some pro tips:
- Water Quality Matters: Since cold brew relies on slow extraction, the water’s flavor shines through. Use filtered or bottled water if your tap water tastes off.
- Experiment with Ratios: The 1:4 ratio is a starting point. For a stronger brew, try 1:3; for a lighter one, 1:5.
- Bean Freshness: Freshly roasted beans (within a month of roasting) yield the best flavor. Check the roast date if possible.
- Temperature Tweaks: Room temp steeping is faster, but fridge steeping can prevent bacterial growth in warmer climates.
- Double Filtering: For crystal-clear coffee, strain twice—once through a sieve, then through a paper filter.
Common Mistakes and How to Fix Them
Even with a simple process, things can go awry. Here’s how to troubleshoot:
- Too Weak: Increase the coffee-to-water ratio or steep longer next time.
- Too Bitter: Reduce steeping time or use a coarser grind to limit over-extraction.
- Gritty Texture: Double-check your grind size (go coarser) and filter more thoroughly.
- Cloudy Brew: This is usually from fine grounds slipping through. Use a finer filter or let it settle before pouring.
Creative Cold Brew Recipes
Cold brew’s versatility is one of its superpowers. Here are some fun ways to enjoy it:
- Classic Cold Brew
- 1 part concentrate, 1 part cold water, ice. Simple and timeless.
- Vanilla Sweet Cream Cold Brew
- Mix 1 part concentrate with 1 part milk. Add a splash of vanilla extract and a teaspoon of sugar or honey. Top with whipped cream for indulgence.
- Mocha Cold Brew
- Stir 1-2 tablespoons of chocolate syrup into your diluted cold brew. Add a splash of cream and ice.
- Cold Brew Tonic
- Combine 1 part concentrate with 2 parts tonic water over ice. Garnish with a lemon twist for a fizzy, refreshing twist.
- Affogato-Style
- Pour cold brew concentrate over a scoop of vanilla ice cream for a decadent treat.
Scaling Up: Batch Brewing
If you’re hooked on cold brew, make a bigger batch to last the week. For a gallon (128 ounces) of concentrate:
- Use 4 cups (about 400-480 grams) of coarse coffee grounds.
- Add 16 cups (128 ounces) of cold water.
- Steep, filter, and store as usual.
This yields about 16 servings of diluted cold brew—perfect for busy mornings or sharing with friends.
Cold Brew vs. Iced Coffee: What’s the Difference?
You might wonder how cold brew stacks up against iced coffee. Iced coffee is brewed hot (typically via drip or pour-over) and then cooled with ice, which can dilute it and highlight acidity. Cold brew, with its slow, cold-water process, is smoother and more concentrated, making it less prone to watering down over ice. If you’ve found iced coffee too sharp or weak, cold brew might be your new go-to.
Sustainability and Cost Savings
Making cold brew at home isn’t just delicious—it’s economical and eco-friendly. A pound of coffee beans (about $10-15) can yield multiple batches, far cheaper than $4-$6 coffee shop cold brews. Plus, you’re cutting down on single-use cups and straws. Reuse your grounds as compost or a DIY scrub, and you’ve got a zero-waste win.
Final Thoughts
Mastering cold brew coffee at home is less about precision and more about experimentation. Start with the basic recipe, then tweak the grind, ratio, steep time, and add-ins until it’s your perfect cup. It’s a low-effort, high-reward process that transforms your kitchen into a personal café. So grab some beans, a jar, and a little patience—your next great coffee moment is just a steep away.


