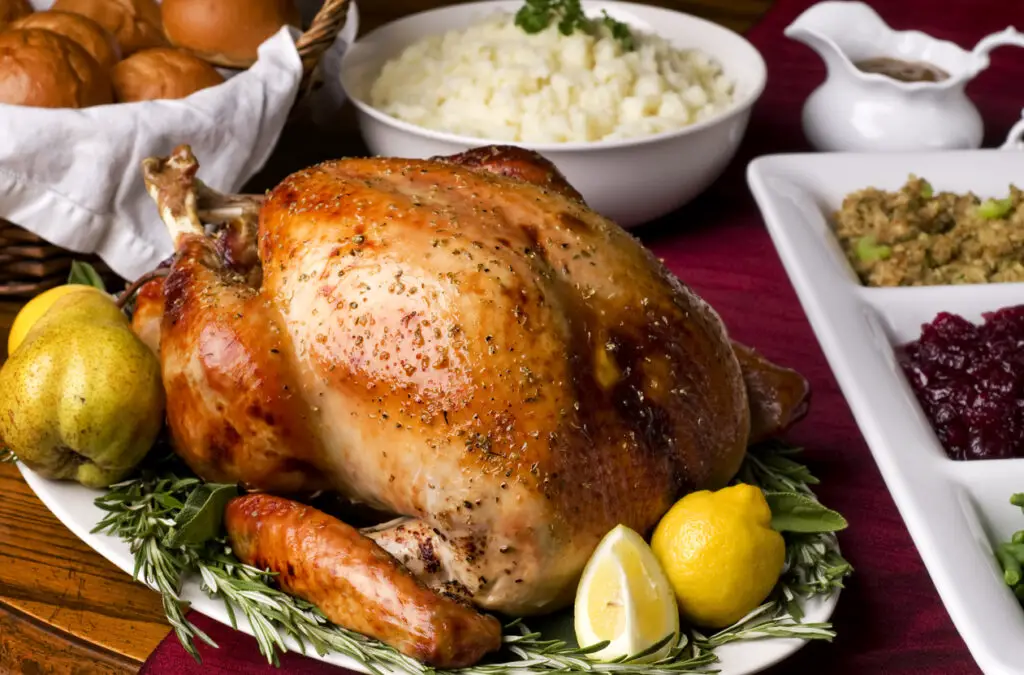
Rosemary Roasted Turkey is a classic recipe that brings out the rich flavors of the turkey, complemented by the aromatic essence of rosemary. This dish is perfect for festive occasions such as Thanksgiving, Christmas, or any gathering where you’re looking to impress with your culinary skills. The key to this recipe lies in the preparation of the turkey and the careful blend of herbs and spices that infuse the meat with a savory, fragrant flavor. Here’s a detailed guide on how to prepare Rosemary Roasted Turkey that will surely be the centerpiece of your festive table.
Ingredients:
1 whole turkey (about 12-14 pounds), thawed
2 tablespoons olive oil
4 sprigs of fresh rosemary
2 tablespoons fresh thyme leaves
1 lemon, halved
4 cloves garlic, minced
1 large onion, quartered
Salt and freshly ground black pepper
2 cups chicken broth
Additional rosemary and thyme sprigs for garnish
Instructions:
Prepare the Turkey:
Preheat your oven to 325°F (165°C).
Remove the turkey giblets and neck from the interior. Rinse the turkey under cold running water and pat dry with paper towels.
Place the turkey in a large roasting pan.
Flavor Infusion:
In a small bowl, mix olive oil, minced garlic, salt, and freshly ground black pepper.
Gently loosen the skin from the turkey breast and drumsticks, and spread the olive oil mixture under the skin.
Inside the turkey cavity, place the lemon halves, quartered onion, and sprigs of rosemary and thyme. These will infuse the turkey with a fresh, herbaceous flavor as it cooks.
Roasting:
Truss the legs of the turkey together with kitchen string and tuck the wing tips under the body to prevent burning.
Season the outside of the turkey with salt and freshly ground black pepper.
Pour the chicken broth into the bottom of the roasting pan. This will help keep the turkey moist during cooking and create a flavorful base for gravy.
Roast the turkey in the preheated oven for about 13-15 minutes per pound, or until a meat thermometer inserted into the thickest part of the thigh reads 165°F (74°C).
Resting:
Once cooked, remove the turkey from the oven and tent it loosely with aluminum foil. Let it rest for at least 20 minutes before carving. This allows the juices to redistribute throughout the meat, ensuring a moist and flavorful turkey.
Serving:
Transfer the turkey to a large serving platter and garnish with additional sprigs of rosemary and thyme.
Carve the turkey and serve it with your choice of side dishes.
Tips for Success:
Brining: For an even juicier turkey, consider brining the turkey for 24 hours before cooking.
This enhances the moisture and flavor of the meat.
Basting: Baste the turkey every 45 minutes with the pan juices to keep it moist and add an extra layer of flavor.
Thermometer: Always use a meat thermometer to ensure the turkey has reached the safe internal temperature of 165°F (74°C).
Rosemary Roasted Turkey is not only a feast for the taste buds but also a visual delight. The golden-brown skin, fragrant aroma, and tender, juicy meat make it a favorite for any festive occasion. With careful preparation and attention to detail, you can create a memorable meal that your guests will talk about for years to come.
Making Gravy from Pan Drippings:
One of the best parts about roasting a turkey is the flavorful pan drippings left behind, perfect for making homemade gravy. Here’s a simple way to turn those drippings into a delicious gravy to complement your Rosemary Roasted Turkey.
Ingredients:
Pan drippings from the roasted turkey
1/4 cup all-purpose flour
2 cups chicken broth or water (additional to what was used for roasting)
Salt and pepper to taste
Instructions:
Separate Fat: After removing the turkey from the roasting pan, pour the pan drippings through a strainer into a bowl. Let it sit for a few minutes to allow the fat to rise to the top. Skim off and discard the excess fat, or save a few tablespoons for making the roux.
Make the Roux: In the same roasting pan or in a saucepan over medium heat, add the reserved turkey fat. Stir in the flour to form a paste, cooking and stirring for about 1-2 minutes to cook off the raw flour taste.
Add Liquids: Gradually whisk in the chicken broth or water along with the strained pan drippings. Continue to cook and stir until the gravy comes to a boil and thickens. If the gravy is too thick, you can add more broth or water until you reach your desired consistency.
Season: Taste the gravy and adjust the seasoning with salt and pepper as needed. Remember, the drippings can be quite flavorful, so it’s best to taste before adding too much salt.
Serve: Once the gravy has thickened and is seasoned to your liking, pour it into a gravy boat or serving dish. Serve hot alongside the Rosemary Roasted Turkey.
Final Touches and Presentation:
The presentation of your Rosemary Roasted Turkey can make a significant impact on your festive table. Here are a few tips to make sure your turkey is not only delicious but also visually appealing:
Platter Garnish: In addition to rosemary and thyme, consider adding other garnishes such as orange slices, cranberries, or pomegranate seeds around the turkey on the platter. These can add a pop of color and enhance the festive look.
Carving: Carve the turkey neatly and arrange the slices overlapping slightly on a platter. Include some of the leg meat and wings for a variety of choices for your guests.
Accompaniments: Serve the turkey with a selection of side dishes that complement its flavors. Traditional options include stuffing, mashed potatoes, cranberry sauce, and roasted vegetables. Each side dish should be placed in its serving dish, creating an inviting and abundant display.
Wine Pairing: Consider serving a wine that complements the savory, herbaceous flavors of the turkey. A medium-bodied Chardonnay or a Pinot Noir can be excellent choices that balance the richness of the turkey and its accompaniments.
Creating a Rosemary Roasted Turkey with all the trimmings is a wonderful way to celebrate any special occasion. It’s a recipe that requires some effort, but the result is a truly festive and flavorful meal that your guests will appreciate. Enjoy the process, and don’t forget to bask in the compliments from your satisfied diners!


