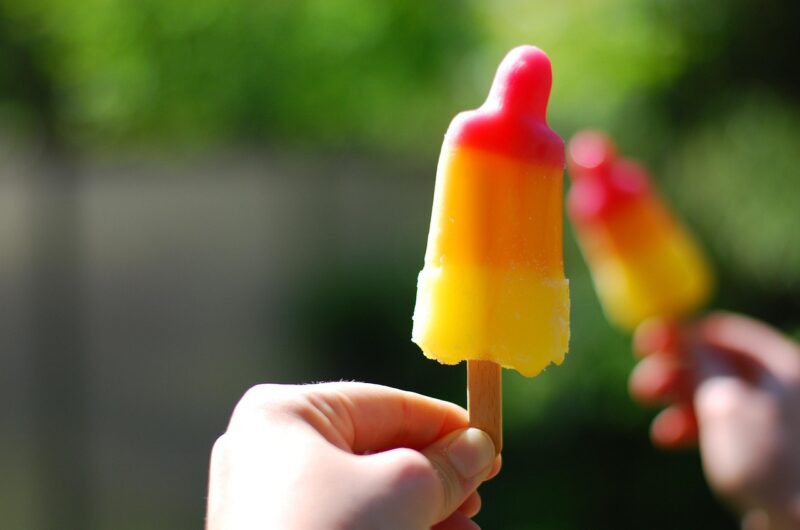
Popsicles are the ultimate summer treat—cool, refreshing, and endlessly customizable. But what happens when you’re craving a frosty delight and realize you don’t have a popsicle mold? Don’t worry! You don’t need fancy equipment to whip up delicious homemade popsicles. With a little creativity and some everyday household items, you can craft frozen goodies that rival anything store-bought. Here are 10 genius ways to make popsicles without a mold, complete with step-by-step guidance and flavor inspiration to get you started.
1. Ice Cube Trays: Tiny Pops with Big Flavor
Ice cube trays are a kitchen staple, and they double as a fantastic popsicle hack. These small compartments are perfect for bite-sized frozen treats, ideal for kids or portion control.
How to Do It:
- Fill each cube of the tray with your favorite popsicle mixture—think fruit juice, blended smoothies, or even yogurt.
- Cover the tray with plastic wrap or aluminum foil to hold the sticks in place.
- Insert a toothpick or small skewer into the center of each cube through the covering.
- Freeze for 4-6 hours until solid, then pop them out by twisting the tray or running warm water over the bottom.
Flavor Idea: Mix orange juice with a swirl of vanilla yogurt for a creamsicle-inspired bite.
Pro Tip: If toothpicks feel flimsy, cut wooden coffee stirrers or skewers to size for sturdier handles.
2. Paper Cups: Classic and Customizable
Disposable paper cups are a versatile stand-in for molds, allowing you to make popsicles in any size you like. Plus, they’re easy to peel away once frozen.
How to Do It:
- Pour your liquid mixture (juice, puree, or a layered combo) into small paper cups—3-ounce bathroom cups work great.
- Place the cups on a tray for stability, then freeze for about an hour until the mixture starts to set.
- Insert a wooden popsicle stick or plastic spoon into the center, then freeze fully for another 4-5 hours.
- Tear the paper away to reveal your popsicle.
Flavor Idea: Layer strawberry puree, lemonade, and blueberry juice for a patriotic red-white-and-blue treat.
Pro Tip: Reuse the sticks or spoons to reduce waste—rinse and save them for your next batch.
3. Silicone Baking Cups: Reusable and Flexible
If you’ve got silicone muffin liners or baking cups lying around, you’re in luck. Their flexibility makes them perfect for popping out frozen treats without a fuss.
How to Do It:
- Fill each silicone cup about two-thirds full with your mixture—try a blend of coconut milk and crushed pineapple for a tropical vibe.
- Place them on a baking sheet or plate for easy transport to the freezer.
- After an hour of freezing, add a stick (wooden or plastic) and let them freeze completely.
- Peel the silicone away once solid.
Flavor Idea: Blend mango, lime juice, and a touch of chili powder for a sweet-spicy kick.
Pro Tip: Silicone cups are dishwasher-safe, so cleanup is a breeze.
4. Yogurt Containers: Upcycled Popsicle Perfection
Empty single-serve yogurt or applesauce containers are just the right size for a popsicle, and they’re a great way to repurpose something you’d otherwise toss.
How to Do It:
- Rinse out the container thoroughly and fill it with your mixture—chocolate milk makes a fudgy delight.
- Cover the top with foil to anchor your stick, then poke a popsicle stick or straw through the center.
- Freeze for 5-6 hours, then cut or peel the container away (foil-topped ones are easiest).
Flavor Idea: Mix Greek yogurt with honey and fresh berries for a creamy, protein-packed treat.
Pro Tip: If the container is plastic, run it under warm water to loosen the popsicle.
5. Shot Glasses: Sophisticated Mini Pops
For a chic twist, use shot glasses to create elegant, petite popsicles. They’re perfect for parties or a quick cool-down.
How to Do It:
- Pour a flavorful liquid (like iced coffee or fruit-infused water) into each shot glass.
- Cover with foil and insert a small stick or cocktail stirrer.
- Freeze until solid, then dip the bottom in warm water for a few seconds to release the popsicle.
Flavor Idea: Combine cold brew coffee, sweetened condensed milk, and a pinch of cinnamon for a latte-inspired pop.
Pro Tip: Glass conducts cold well, so these freeze faster than plastic options—check after 3-4 hours.
6. Loaf Pan: Slice-and-Serve Popsicle Slab
Why make individual pops when you can freeze a whole slab and slice it up? A loaf pan turns your popsicle game into a shareable masterpiece.
How to Do It:
- Line a loaf pan with plastic wrap or parchment paper for easy removal.
- Pour in a thick mixture—like blended watermelon and mint—or layer multiple flavors.
- Freeze until semi-solid (about 2 hours), then insert sticks evenly across the surface if you want handheld pieces.
- Once fully frozen (6-8 hours), lift out the slab and slice into squares or rectangles.
Flavor Idea: Swirl peanut butter into a banana-yogurt base for a rich, creamy treat.
Pro Tip: No sticks? Skip them and serve the slices on a plate with a fork.
7. Plastic Spoons: Instant Popsicle Handles
Plastic spoons aren’t just for eating—they’re a brilliant all-in-one popsicle solution. The spoon becomes both the mold and the handle.
How to Do It:
- Line up plastic spoons on a tray or in a shallow dish.
- Carefully spoon your mixture (like pureed peaches with a splash of cream) onto the spoon heads.
- Freeze as-is for a thin layer, or prop them upright in a cup of sugar or rice to hold more liquid while freezing.
- Peel off the frozen treat and enjoy straight from the spoon.
Flavor Idea: Dip chocolate pudding-filled spoons in sprinkles before freezing for a fun twist.
Pro Tip: Use sturdy spoons to avoid bending under the weight of thicker mixtures.
8. Freezer Bags: Squeeze-and-Freeze Tubes
For a mess-free, portable popsicle, turn to plastic freezer bags. These mimic the squeeze-up popsicles of childhood with minimal effort.
How to Do It:
- Pour your mixture (like lemonade or blended strawberries) into a quart-sized freezer bag.
- Seal it tightly, snip off a small corner, and squeeze the liquid into long, thin strips on a parchment-lined tray.
- Freeze flat for 4-5 hours, then break off pieces or eat straight from the bag.
Flavor Idea: Mix grape juice and a touch of sparkling water for a fizzy-effect pop.
Pro Tip: Double-bag if you’re worried about leaks during freezing.
9. Mason Jar Lids: Rustic Round Pops
The metal rings from mason jar lids can double as circular molds for perfectly round popsicles. It’s a quirky, rustic option that works surprisingly well.
How to Do It:
- Place the lids on a flat surface (like a tray) and line them with plastic wrap to create a base.
- Fill each ring with your mixture—try a blend of kiwi and coconut water.
- Freeze for an hour, then add sticks and finish freezing.
- Pop the plastic wrap out of the ring to release your treat.
Flavor Idea: Layer matcha green tea and sweetened milk for a striking green-and-white design.
Pro Tip: Use wide-mouth lids for bigger pops or regular ones for smaller bites.
10. Egg Cartons: Quirky and Eco-Friendly
An empty egg carton—foam or cardboard—can transform into a popsicle mold with a little ingenuity. It’s an eco-friendly hack that’s as fun as it is functional.
How to Do It:
- Clean the carton thoroughly and line each egg cup with plastic wrap if using cardboard (foam can skip this step).
- Fill the cups with a thick mixture, like blended avocado and lime for a creamy green pop.
- Add sticks after an hour of freezing, then let them set fully.
- Tear away the carton or lift out the plastic wrap to enjoy.
Flavor Idea: Mix lemonade with chopped basil for a refreshing herbal twist.
Pro Tip: Foam cartons release popsicles more easily than cardboard, which may stick.
Tips for Popsicle Success Without a Mold
No matter which method you choose, a few universal tricks will elevate your popsicle game:
- Sweeten Smartly: Freezing dulls sweetness, so taste your mixture beforehand and add a bit more honey, sugar, or agave if needed.
- Texture Matters: Blend chunks of fruit or add mix-ins like nuts or chocolate chips for a satisfying bite.
- Release with Ease: A quick dip in warm water (or a gentle twist) helps free your popsicles from their makeshift molds.
- Experiment Freely: Combine flavors, layer colors, or even sneak in veggies—zucchini in a chocolate pop? Why not!
Why Go Mold-Free?
Making popsicles without a mold isn’t just a workaround—it’s a chance to get creative. You’re not limited by the size or shape of a store-bought mold, and you can repurpose items you already have. It’s budget-friendly, eco-conscious, and lets you whip up a treat on a whim. Plus, the satisfaction of turning a yogurt cup or ice tray into a dessert masterpiece? Priceless.
Final Thoughts
Popsicles are all about fun, flavor, and beating the heat, and you don’t need a mold to make them happen. From tiny ice cube pops to rustic mason jar rounds, these 10 genius methods prove that ingenuity is the only tool you really need. So raid your kitchen, pick a method, and start freezing—your next favorite summer snack is just a few hours away. What will you try first?
