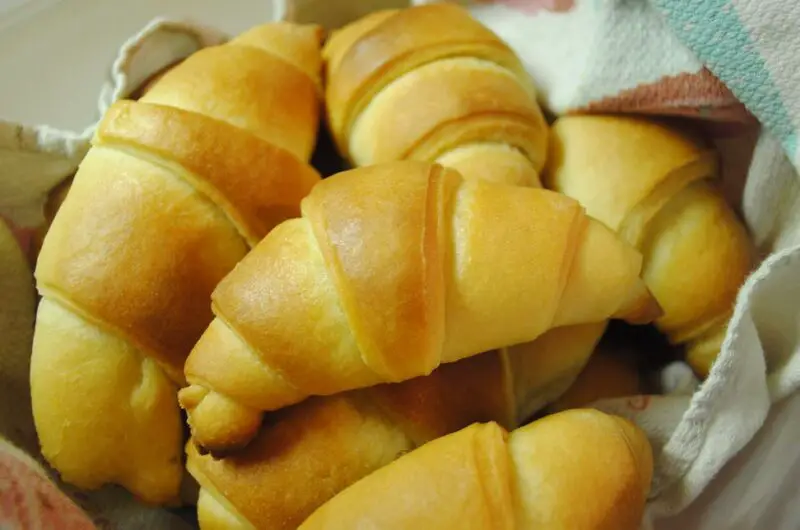
Crescent rolls are a beloved staple in many households, known for their light, airy texture and rich buttery flavor. However, for those who follow a gluten-free diet, finding the perfect crescent roll recipe can be challenging. Many store-bought options fall short in taste and texture, often being too dense or crumbly.
This guide will walk you through a tried-and-true gluten-free crescent roll recipe, ensuring that you get the soft, flaky, and buttery goodness without the gluten. Whether you’re baking for a holiday gathering or just want to enjoy a warm roll with your meal, this recipe is bound to become a favorite.
Why Make Homemade Gluten-Free Crescent Rolls?
1. Better Texture and Flavor
Many store-bought gluten-free bread products lack the fluffiness and flavor of traditional baked goods. This homemade recipe ensures that you achieve a tender, buttery texture that melts in your mouth.
2. Healthier Ingredients
When you make your own crescent rolls, you have full control over the ingredients. Many pre-packaged gluten-free options contain preservatives and additives that may not be ideal for a healthy diet.
3. Customizable and Versatile
Once you have a perfect gluten-free dough, you can get creative with fillings, from savory cheese and herbs to sweet cinnamon and sugar.
Ingredients for Gluten-Free Crescent Rolls
Dry Ingredients:
- 2 ½ cups gluten-free all-purpose flour (with xanthan gum)
- 1 tablespoon granulated sugar
- 2 teaspoons baking powder
- ½ teaspoon salt
Wet Ingredients:
- ½ cup warm milk (or dairy-free alternative)
- 2 teaspoons active dry yeast
- 2 tablespoons honey or maple syrup
- 1 egg, room temperature
- ¼ cup melted butter (or dairy-free butter alternative)
Additional Ingredients:
- ¼ cup softened butter (for layering)
- 1 egg yolk + 1 tablespoon water (for egg wash)
Step-by-Step Instructions
Step 1: Activate the Yeast
- In a small bowl, warm the milk (it should be around 110°F or warm to the touch, but not hot).
- Stir in the honey (or maple syrup) and sprinkle the yeast over the top.
- Let it sit for 5-10 minutes, until it becomes frothy and bubbly. This means the yeast is activated and ready to work.
Step 2: Mix the Dry Ingredients
- In a large mixing bowl, whisk together the gluten-free flour, sugar, baking powder, and salt.
- Make sure the dry ingredients are evenly combined to avoid clumping.
Step 3: Combine the Wet and Dry Ingredients
- Create a well in the center of the dry ingredients and pour in the yeast mixture, egg, and melted butter.
- Mix until a sticky dough forms. If the dough feels too dry, add 1-2 tablespoons of warm milk.
Step 4: Knead the Dough
- Transfer the dough to a lightly floured surface (using gluten-free flour).
- Knead gently for 2-3 minutes, just until it becomes smooth. Avoid over-kneading, as gluten-free dough is more delicate.
Step 5: First Rise
- Place the dough in a lightly greased bowl, covering it with plastic wrap or a damp towel.
- Let it rise in a warm place for about 60 minutes, or until it has doubled in size.
Step 6: Rolling Out the Dough
- Once risen, turn the dough onto a floured surface.
- Roll it out into a large circle, about ¼ inch thick.
- Spread the softened butter over the surface for added flakiness.
Step 7: Cutting and Shaping the Rolls
- Using a sharp knife or a pizza cutter, divide the circle into 8-12 triangle-shaped pieces.
- Starting from the wide end, roll each triangle tightly toward the pointed tip.
- Place the rolled crescents on a baking sheet lined with parchment paper, leaving space between them.
Step 8: Second Rise
- Cover the crescent rolls loosely with a towel and let them rise for another 30 minutes.
Step 9: Egg Wash and Baking
- Preheat your oven to 375°F (190°C).
- In a small bowl, whisk together the egg yolk and water to make an egg wash.
- Brush the tops of the crescent rolls with the egg wash for a golden-brown finish.
- Bake for 12-15 minutes, or until the rolls are golden brown and slightly firm to the touch.
Step 10: Cool and Serve
- Allow the rolls to cool for at least 10 minutes before serving.
- Enjoy them warm with butter, jam, or as a side to your favorite meals!
Tips for Perfect Gluten-Free Crescent Rolls
1. Choosing the Right Gluten-Free Flour
A good gluten-free all-purpose flour blend should contain xanthan gum or guar gum to help with elasticity. Some great options include:
- Bob’s Red Mill 1-to-1 Baking Flour
- King Arthur Measure for Measure Flour
- Cup4Cup Gluten-Free Flour
2. Adding More Flavor
For an extra buttery taste, brush the rolls with melted butter right after they come out of the oven.
3. Making Them Dairy-Free
Use almond milk, oat milk, or coconut milk in place of regular milk. Substitute butter with vegan butter for a dairy-free version.
4. Filling Variations
- Savory: Add shredded cheese, garlic butter, or fresh herbs before rolling.
- Sweet: Sprinkle cinnamon sugar on the dough before rolling and drizzle with icing after baking.
How to Store and Reheat Gluten-Free Crescent Rolls
Storing
- Keep leftovers in an airtight container at room temperature for up to 2 days.
- Store in the fridge for up to 5 days.
- Freeze unbaked crescent rolls for up to 3 months.
Reheating
- Oven: Warm at 300°F for 5-7 minutes for best texture.
- Microwave: Heat for 15-20 seconds, but avoid overheating as it can make them dry.
Serving Ideas for Crescent Rolls
- Breakfast: Serve with eggs and avocado for a hearty meal.
- Dinner Side: Pair with soups, salads, or roasted meats.
- Appetizer: Wrap around cheese or mini sausages for gluten-free pigs in a blanket.
Final Thoughts
Making homemade gluten-free crescent rolls may take a little time, but the result is absolutely worth it. These soft, flaky, buttery rolls are perfect for any occasion, from breakfast to holiday feasts. With the right techniques and ingredients, you’ll never feel like you’re missing out on classic crescent rolls again.
So, grab your flour and yeast, and get baking! Your gluten-free crescent rolls will impress everyone at the table. Happy baking! 🍽✨


