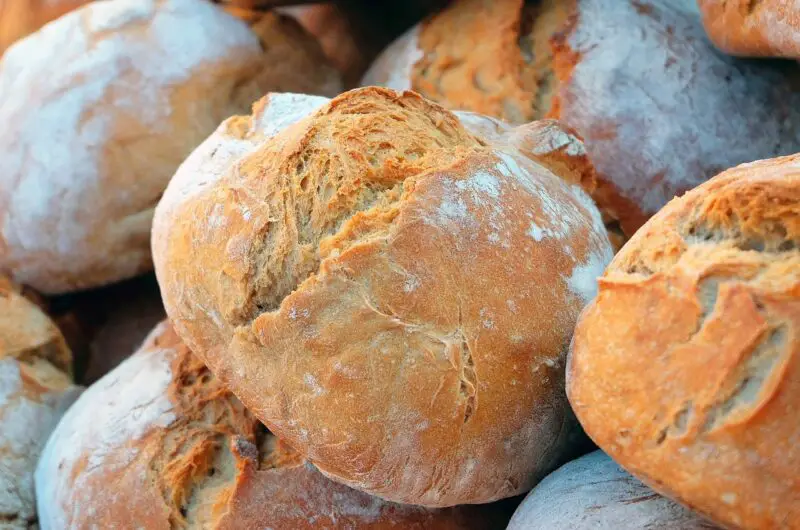
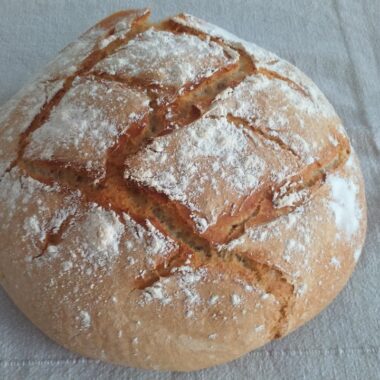
Sourdough bread, with its crisp crust, chewy crumb, and tangy flavor, is a staple of artisan baking. Unlike commercial breads that rely on instant yeast, sourdough is a labor of love, harnessing wild yeast and bacteria to create a loaf that’s as unique as the baker. This 2,000-word guide will walk you through the best sourdough bread recipe, offering detailed instructions, tips, and troubleshooting advice to ensure your loaf is bakery-worthy. Whether you’re a novice or a seasoned baker, this recipe is designed for success.
Why Sourdough?
Before diving into the recipe, let’s explore why sourdough is worth the effort. Sourdough bread is naturally leavened, meaning it rises without commercial yeast. The fermentation process, driven by a sourdough starter, breaks down starches and gluten, making the bread easier to digest for some people. It also develops complex flavors—tangy, nutty, or even slightly sweet—depending on your starter and technique. Plus, sourdough’s long fermentation can enhance nutrient bioavailability, adding a subtle health benefit to its irresistible taste.
This recipe is for a classic white sourdough loaf, adaptable for beginners and pros alike. It yields one large boule (round loaf) with a crackling crust and open, airy crumb. Let’s get started.
Equipment You’ll Need
To make the best sourdough, gather these tools:
- Digital scale: Precision is key in sourdough baking. Measuring by weight ensures consistency.
- Mixing bowl: A large, non-reactive bowl (glass or stainless steel) works best.
- Banneton or proofing basket: For shaping and final proofing. A bowl lined with a floured tea towel can substitute.
- Dutch oven: A cast-iron Dutch oven traps steam, mimicking a professional bread oven for a crispy crust.
- Lame or sharp knife: For scoring the dough before baking.
- Bench scraper: Helps handle sticky dough and divide portions.
- Thermometer (optional): Useful for checking water temperature or loaf doneness.
- Parchment paper: Prevents sticking in the Dutch oven.
- Kitchen towels: For covering dough during rest periods.
Ingredients
For one large boule (approximately 900g dough):
- 400g bread flour (12-13% protein content for optimal gluten development)
- 100g whole wheat flour (adds flavor and nutrition; can substitute with more bread flour)
- 350g water (filtered or dechlorinated, at 80°F/27°C for ideal fermentation)
- 100g active sourdough starter (fed 6-12 hours prior, at peak activity)
- 10g fine sea salt (avoid iodized salt, which can inhibit fermentation)
Hydration note: This recipe uses 70% hydration (water weight relative to flour). It’s beginner-friendly yet yields a moderately open crumb. For a more open texture, increase water to 375g (75% hydration) after mastering the basics.
Step-by-Step Sourdough Bread Recipe
This process spans 12-24 hours, depending on your kitchen temperature and starter strength. Most of the time is hands-off, letting fermentation work its magic. Follow these steps for a foolproof loaf.
Step 1: Prepare Your Starter (6-12 Hours Before Mixing)
A lively starter is the heart of sourdough. Feed your starter 6-12 hours before mixing the dough:
- Combine 25g mature starter, 50g water (80°F/27°C), and 50g flour (equal parts bread and whole wheat flour).
- Mix until smooth, cover loosely, and let sit at room temperature (70-75°F/21-24°C).
- The starter is ready when it doubles in volume, has a domed surface, and smells pleasantly tangy (not overly acidic). Test it: a spoonful should float in water.
If your starter isn’t active, feed it again and wait another 4-6 hours.
Step 2: Autolyse (30-60 Minutes)
Autolyse hydrates the flour, kickstarting gluten development and improving dough structure.
- In a large mixing bowl, combine 400g bread flour, 100g whole wheat flour, and 350g water.
- Mix by hand until no dry flour remains. The dough will be shaggy and sticky.
- Cover with a damp towel and rest for 30-60 minutes at room temperature.
Tip: A longer autolyse (up to 1 hour) enhances extensibility, making the dough easier to shape.
Step 3: Mix the Dough (10 Minutes)
Incorporate the starter and salt to form the dough.
- Add 100g active starter to the autolysed dough. Pinch and fold the dough to distribute the starter evenly.
- Sprinkle 10g salt over the surface. Wet your hands to prevent sticking, then knead gently for 2-3 minutes until the salt is absorbed. The dough will feel soft and slightly tacky.
- Cover and let rest for 30 minutes.
Tip: If the dough feels too sticky, resist adding flour. Wet hands make handling easier.
Step 4: Bulk Fermentation (4-6 Hours)
Bulk fermentation develops flavor and structure through natural leavening.
- Place the covered dough in a warm spot (75-80°F/24-27°C). Ideal kitchen temperature is key—colder rooms slow fermentation, while warmer ones speed it up.
- Every 30 minutes for the first 2 hours, perform a series of stretch-and-folds: Wet your hands, grab one side of the dough, stretch it upward, and fold it over the center. Rotate the bowl 90 degrees and repeat for all four sides. Complete 4-6 sets total.
- After the stretch-and-folds, let the dough rest undisturbed for 2-4 hours. The dough is ready when it’s puffy, increased by 30-50% in volume, and shows small bubbles on the surface.
Troubleshooting: If the dough isn’t rising, extend bulk fermentation by 1-2 hours or move it to a warmer spot. A sluggish starter may need a refresh before the next bake.
Step 5: Pre-Shape (10 Minutes)
Pre-shaping builds tension for a stronger structure.
- Lightly flour your work surface. Turn the dough out using a bench scraper.
- Gently shape it into a loose round by folding the edges toward the center.
- Cover with a towel and rest for 20-30 minutes.
Step 6: Final Shape (5 Minutes)
Shape the dough for its final proof.
- Lightly flour the top of the dough and flip it over (floured side down).
- Fold the bottom edge up to the center, then the left and right sides inward. Roll the top down to form a tight boule.
- Pinch the seams to seal. Dust a banneton (or lined bowl) with rice flour or bread flour, then place the dough seam-side up.
Tip: For a tighter shape, use a bench scraper to tuck the edges under while rotating the dough.
Step 7: Final Proof (3-4 Hours or Overnight)
The final proof lets the dough rise before baking.
- Room-temperature proof: Cover the banneton with a towel or plastic wrap and let the dough rise for 3-4 hours at 75°F/24°C. It’s ready when it’s slightly puffy and springs back slowly when poked.
- Cold proof (optional): For convenience or deeper flavor, refrigerate the dough for 8-16 hours. This slows fermentation and makes scoring easier.
Note: Cold-proofed dough can go straight from the fridge to the oven—no need to warm up.
Step 8: Preheat the Oven (45-60 Minutes)
A hot oven and steam are critical for crust and oven spring.
- Place a Dutch oven with its lid on in the oven. Preheat to 475°F/245°C for 45-60 minutes.
- If not using a Dutch oven, preheat a baking stone with a metal tray below for steam.
Step 9: Score and Bake (45-50 Minutes)
Scoring allows the dough to expand gracefully in the oven.
- Cut a square of parchment paper. Gently turn the dough onto it (seam-side down).
- Dust lightly with flour for a rustic look. Using a lame or sharp knife, score the top with a ½-inch-deep slash or pattern (e.g., a square or crescent).
- Carefully transfer the dough (on parchment) to the hot Dutch oven. Cover and bake for 20 minutes.
- Remove the lid to release steam and bake uncovered for 20-25 minutes, until the crust is deep golden-brown and the internal temperature reaches 205-210°F/96-99°C.
- For non-Dutch oven baking: Slide the dough onto the baking stone, pour 1 cup boiling water into the metal tray for steam, and bake for 40-50 minutes.
Tip: Rotate the loaf halfway through baking for even browning.
Step 10: Cool and Enjoy (1-2 Hours)
Cooling sets the crumb and enhances flavor.
- Remove the loaf from the Dutch oven and place it on a wire rack.
- Let cool for at least 1-2 hours before slicing. Cutting too soon can result in a gummy texture.
Slice and enjoy with butter, jam, or your favorite toppings. The bread stays fresh for 3-4 days at room temperature in a cloth bag or freezes well for up to a month.
Tips for Success
- Master Your Starter: A healthy, active starter is non-negotiable. Feed it regularly (daily if kept at room temp, weekly if refrigerated) and learn its rhythm.
- Control Temperature: Use a thermometer to monitor water and room temperature. A proofing box or warm oven (turned off) can help in cold climates.
- Practice Patience: Sourdough rewards slow, attentive baking. Don’t rush fermentation or cooling.
- Experiment with Flours: Try rye, spelt, or einkorn for unique flavors. Adjust water slightly, as flours absorb differently.
- Steam Is Key: A Dutch oven simplifies steam, but a spray bottle or ice cubes tossed into the oven can work too.
- Keep Notes: Record your flour brands, fermentation times, and results to refine your process.
Troubleshooting Common Issues
- Dense Loaf: Underproofed dough or weak starter. Ensure the starter floats and proof until puffy.
- Flat Loaf: Overproofed dough or poor shaping. Check proofing with the poke test and shape tightly.
- Gummy Crumb: Undercooked loaf or cut too soon. Bake to 205°F/96°C and cool fully.
- No Oven Spring: Cold dough, weak starter, or insufficient steam. Preheat thoroughly and score deeply.
- Too Sour: Overfermented dough. Shorten bulk fermentation or use less starter (80g instead of 100g).
Variations to Try
Once you’ve mastered the basic recipe, experiment with these twists:
- Seeded Sourdough: Add 50g toasted sesame, sunflower, or pumpkin seeds during the final stretch-and-fold.
- Olive and Herb: Mix in 100g chopped olives and 1 tbsp rosemary or thyme after autolyse.
- Cinnamon Raisin: Incorporate 75g raisins and 1 tsp cinnamon for a sweet loaf.
- Whole Grain: Swap 200g bread flour for rye or spelt, increasing water to 375g for hydration.
The Science Behind the Recipe
Sourdough’s magic lies in its microbial dance. The starter contains Lactobacillus bacteria and wild yeast. Yeast ferments sugars in the flour, producing carbon dioxide to leaven the dough. Bacteria break down starches into lactic and acetic acids, giving the tangy flavor. The long fermentation—autolyse, bulk, and final proof—enhances gluten networks, flavor complexity, and digestibility. Hydration affects texture: lower (65%) for tighter crumbs, higher (80%+) for open, holey ones.
Storing and Reviving Sourdough
- Storage: Keep the loaf cut-side down on a board or in a cloth bag for 3-4 days. Avoid plastic, which softens the crust.
- Freezing: Slice and freeze in an airtight bag. Toast or warm to revive.
- Stale Bread: Blend into breadcrumbs, cube for croutons, or soak for bread pudding.
Why This Is the Best Recipe
This recipe balances accessibility and excellence. The 70% hydration is forgiving for beginners yet yields a professional-quality loaf. The mix of bread and whole wheat flour adds depth without overwhelming the tang. Clear timelines and troubleshooting tips ensure success, while variations invite creativity. Whether you’re baking for family or honing your craft, this sourdough delivers.
Final Thoughts
Baking sourdough is a journey, not a race. Each loaf teaches you something new—about your starter, your environment, and your instincts. This recipe, refined through countless bakes, is your roadmap to a crusty, flavorful boule that rivals any bakery. So dust off your scale, feed your starter, and embrace the process. The reward—a warm, fragrant loaf—is worth every moment.


